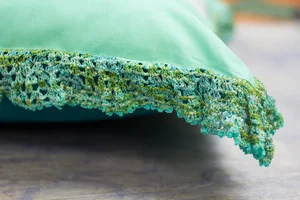
Crochet is a beautiful way to craft or embellish anything from clothing to housewares, however it can also be a time consuming project. Here's an incredible way to replicate the look of crochet by using only your sewing machine and your favourite 12wt WonderFil™ thread! For our demonstration, we're embellishing the edges of a pillowcase using crochet by machine techniques.
Materials:
- 1 or 2 colours of a 12wt thread (we used Accent™, a 12wt rayon. You can also use Spagetti™ and Fruitti™ if you want a cotton look)
- Water soluble stabilizer
- A #16 topstitch needle
- A bi-level presser foot or an open toe appliqué foot
- The fabric or project you wish to embellish (we are crocheting the edges of a pillow case in this demo)
- A sewing machine with an overcasting stitch

1. We chose to use two colours of Accent™ thread: ACM01 in the top and AC944 in the bobbin, so that the two colours will blend together in the crochet. To begin, ready some bobbins wound with your selected 12wt thread. The number you will need will vary depending on the amount of stitching you will be doing, however our suggestions are based on crocheting all four edges around a standard square decorative pillow. If your machine uses L Size bobbins, pre-wind 5-6 bobbins. If your machine uses Class 15 bobbins, pre-wind 2-3 bobbins. This will prevent you needing to wind more bobbins during the middle of your stitching.
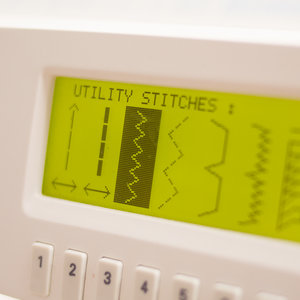
2. You may need to loosen your bobbin tension before stitching as there is a heavier thread in the bobbin. Select the overcasting stitch on your machine (#36 pictured in the left image below), then attach the presser foot (suggestions in the materials section) to your machine. We used a bi-level presser foot which has a raised level on the bottom of the foot (see image to the right below).

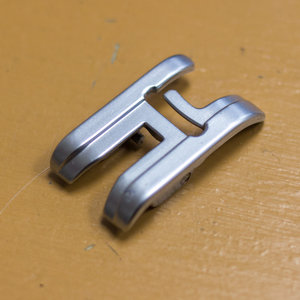
Overcasting stitch #36. Bi-level presser foot.
3. Pin two or three layers of water soluble stabilizer to the edge of the fabric you plan on crocheting. The stabilizer will be the surface you will be stitching over to create your crochet.
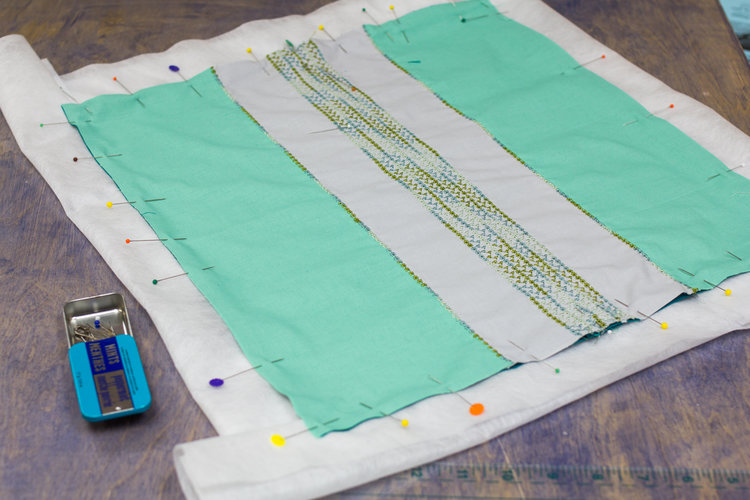
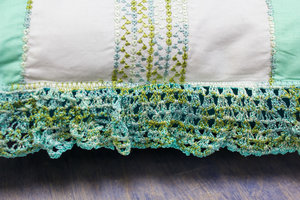
We will be crocheting all four edges of our pillowcase, so have attached water soluble stabilizer to every edge.
4. Choose any side to begin your crochet. If like us, you are stitching all the way around your project, we recommend starting in the middle rather than the corner of your fabric as this will make it easier to line up your crochet when you come back around. Before starting, line up the fabric so that the right side of the needle catches the raw edge of the fabric. Stitch all the way down to the corner and pivot to the next edge.

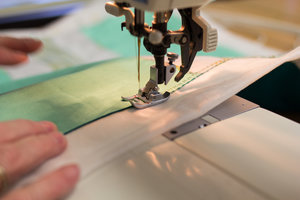
Starting our stitch. Stitching down the edge of the fabric.
Pivoting on the corner of the fabric and continuing down.
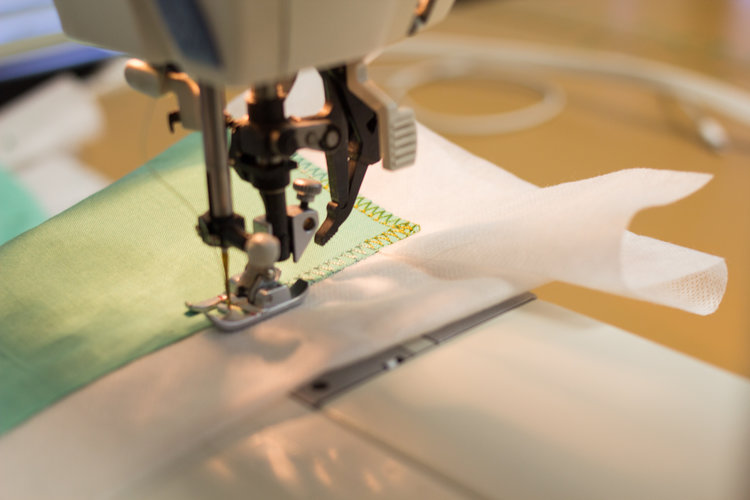
5. When you finish stitching around your fabric and return to the beginning, select the zigzag stitch on your machine and shorten the stitch length so that the stitches sit close together (satin stitch). Work your way around your fabric again using the new stitch. This will help hold your crochet together.

Selecting a zigzag stitch. Shortening the stitch length to create a satin stitch.

Stitching around the fabric with a satin stitch.
6. When you have worked your way around the fabric with the satin stitch and return to the beginning, you can now select the stitch you wish to use to create the crochet design. You can choose any decorative stitch on your machine, however it is better to choose one that doesn't stick out too much on the bottom. Depending on which stitch you choose, the crochet will look different in the end. We chose stitch #154 pictured below.
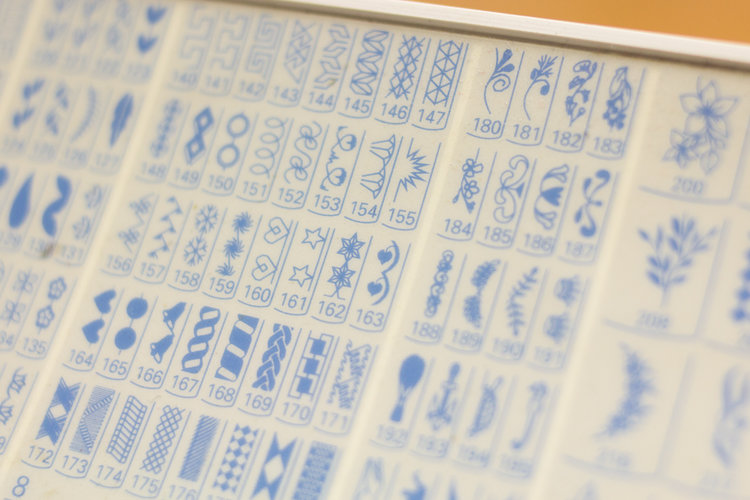
We selected decorative stitch #154 to use for our crochet.
7. Before beginning, ensure the left swing of your needle is on the left side of your satin stitch or you will end up with holes in your crochet.

Using the decorative stitch you have chosen, stitch all the way around your fabric once again. When you have made your way around to the beginning, repeat step 6 and use the satin stitch to finish the bottom edge of your stitching, once again working your way around the fabric to the beginning. Your stitching should now look as pictured below.
<- Stitching with a decorative stitch.

8. Repeat steps 7 and 6 to create several more layers of decorative stitching. The more layers you stitch, the larger the crochet piece you will create. In total, we stitched 7 layers to create a relatively large crochet piece, however you can do fewer if you want a shorter fringe.

After 3 layers of decorative stitching and satin stitching.
9. When you have finished stitching your crochet layers, wash your project to remove the stabilizer. Your finished project will have a beautiful crochet edge!