
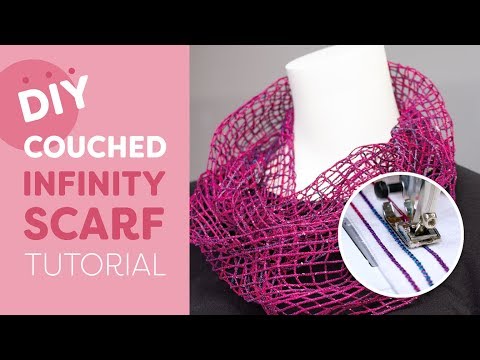
Hello everyone! Today we’re going to show you how you can use 8wt thread and water-soluble stabilizer to create this really cool infinity scarf. It’s incredibly easy and makes for great gifts for friends and family, or as a fun craft you can make for yourself. All you need is a few simple materials and a sewing machine with a zigzag stitch.
If you’d like to watch through our YouTube video tutorial first, you can watch it right here:
We’ll be using this 8wt thread called Dazzle, a rayon thread with one strand of metallic for that extra bit of sparkle. We recommend using a rayon thread because it has a soft and silky finish that will feel nicer against the skin than polyester does.

You can find Dazzle in a shop near you, or online here
For our top thread, we’ll be using this 30wt thread called Mirage. It’s also rayon and comes in a lot of fun variegated colours that will change the look of your scarf as you sew.

You can find Mirage in a shop near you, or online here
In the bobbin we recommend using this strong, fine thread called DecoBob. It’s an 80wt polyester that will help hold your threads together, while also being fine enough that it won’t add extra bulk in the stitching.

You can find DecoBob pre-wound bobbins in your size here
Before you can begin your project, prepare your water soluble stabilizer. The water soluble stabilizer we recommend using looks and feels more like fabric rather than plastic. We used the Floriani Wet N Gone washaway stabilizer: https://rnk-floriani.com/products/Floriani-Water-Soluble-Stabilizers/Floriani-Wet-N-Gone

Plan for your scarf to be about 58 inches or 147.32 cm long and 8 inches or 20cm wide, you will need to cut that length of stabilizer with a little extra overhang. However to make your stabilizer thick enough to couch on, you will need two layers of it.

Don’t worry if your stabilizer isn’t big enough to accommodate the length, you can always tack on an extra piece and it doesn’t need to look pretty because we’ll be washing this away later.
You can use pins, but we prefer to use this water soluble thread called Rinse ‘n Gone because your stabilizer will lay flatter and you won’t have to worry about pulling the pins out later.

It will also wash away with the stabilizer when finished. Stitch or pin both layers of your stabilizer together.

When your stabilizer is cut, loop the ends back on themselves and pin or stitch them together to create the infinity loop.
Now to choose your machine options. Select the zigzag stitch on your machine and slightly decrease the stitch length and increase the stitch width, but by how much will depend on how many threads you’ll be couching.

We’re using two couched threads side by side, which means I need to set my stitch wide enough so the swing of the needle catches both threads.

Do a test on a scrap piece of fabric to make sure your stitch width is wide enough. The needle should just hit the far edges of the threads without penetrating it.
We’re going to use a regular foot for this because we’re just working a zig zag over our couched threads. You can watch our previous tutorial on couching without a couching foot to see if you can get away without one here: https://www.youtube.com/watch?v=EsvDhjNHHdc

You’re now ready to begin couching! Loop your stabilizer around the arm of your sewing machine and thread your 8wt thread under your foot. Position your fabric on the edge and sew all the way down until you loop around and return a few inches away from where you started.

Sew slowly until you catch the beginnings of the threads, then edge your way away from the line you’re following with the first thread. You’ll want to keep about a half inch space away from the previous line of stitching, or about the same width as your foot.

When you’re a few inches away from the beginning of the second row of stitching, start edging away from the line you were following until there is once again about a half inch gap between the rows of stitching.

Go all the way around the loop once again and repeat this step over and over until you reach a width of about 8 inches of total stitching.

To finish the final line of stitching, instead of edging away from the previous threads, slowly sew right into them and incorporate the two lines of stitches.

Do a little back-tacking and trim the threads as close as you can.
You’ve now got half your scarf done. For the next half, we’ll be using two strands again stitching perpendicular to the last rows of stitching to create a grid.

Guiding the couching thread with only your hand, start anywhere along the far edge of your stitching. Work horizontally across the previous stitches. Couch all the way down to the next edge and stitch onto the thread underneath. If you miss catching the thread, you’ll end up with a hole here.

Stop with the needle down on the left side. Lift your presser foot, pivot the fabric, and drop the presser foot. Continue sewing down the edge of the thread with an overlap for about a half inch.

Stop again with the swing of the needle down on the left side. Lift your foot and pivot again, and sew right back across your scarf.
When you reach the other side, you’re going to do the same thing but this time with the directions reversed. You’re going to repeat these steps all the way down your scarf.

When you’ve gone all the way around, you can continue for at least a half inch of overlapped stitching, back tack and cut off your thread.
You’re almost finished, there’s just one more step! Fill a sink with lukewarm water gently massage the stabilizer out of all the holes in your scarf. The stabilizer will melt away leaving just the thread.

When all the stabilizer is gone, leave it to dry on a towel. Once dried you can wear this one of a kind scarf. If you’re looking for ways to style your new scarf, check out this blog for 10 ways to wear it: https://www.stillbeingmolly.com/2013/10/16/style-10-ways-wear-infinity-scarf/

And that’s all there is to it! Now you have a personalized, hand made accessory with a little bit of sparkle to it. If you’re going to make this scarf for yourself, be sure to tag us on social media using the hashtag #wonderfil so that we can share it! You can also sign up for our free newsletter to receive more educational sewing tips, tutorials, and free patterns. Register by clicking here! We’ll see you again next time!