
Here’s a super quick and easy tutorial on how to make a quick machine “blanket stitch” edging on your serger. A two-thread flatlock stitch and some water soluble stabilizer will produce a beautiful, hand finished look. It’s a great way to finish blankets or other projects with this incredibly fast and simple serger solution.
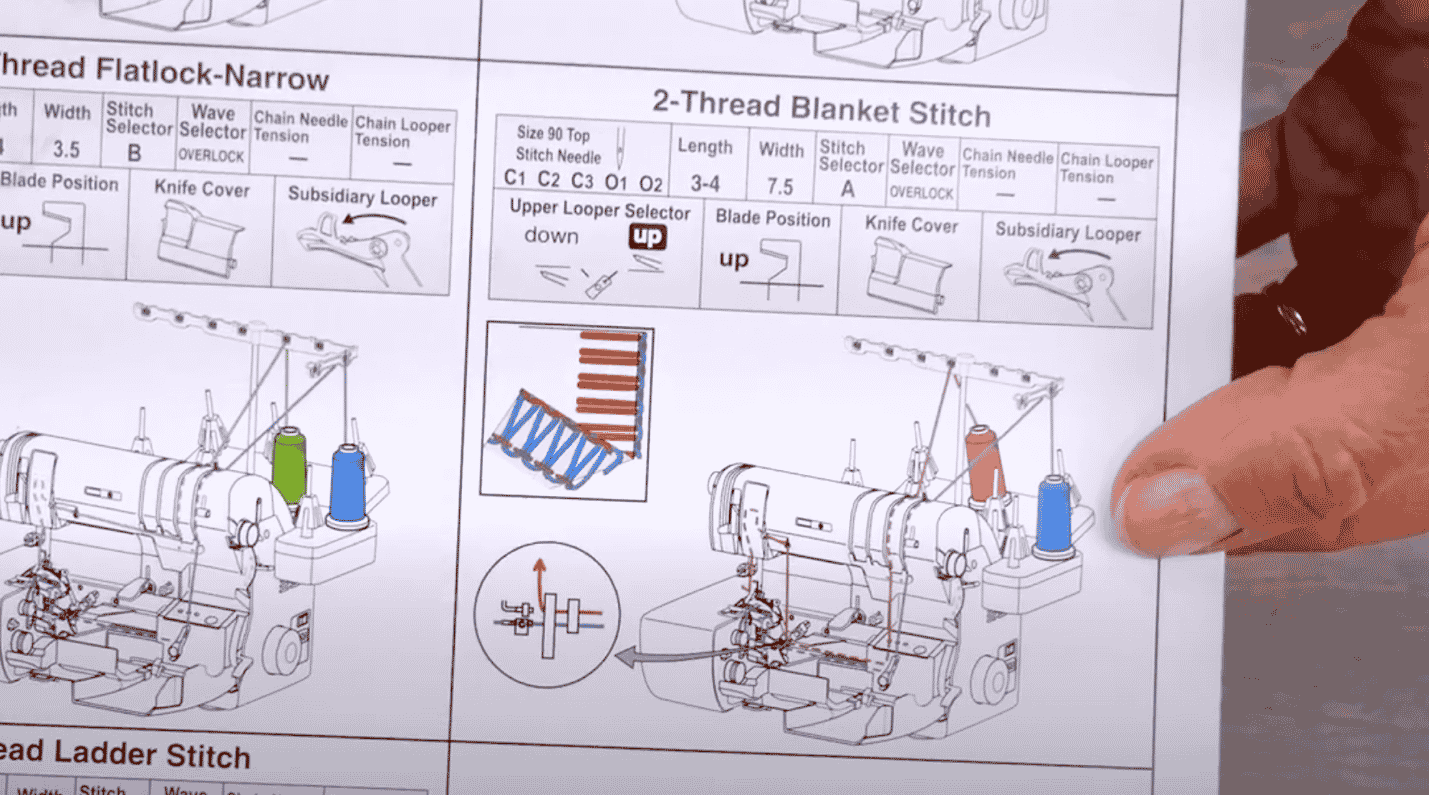
Let’s start by setting up the serger. You will need a serger that has the capability to do a 2 thread flatlock stitch. Most sergers are able to do this, so check your manual to set up your machine.
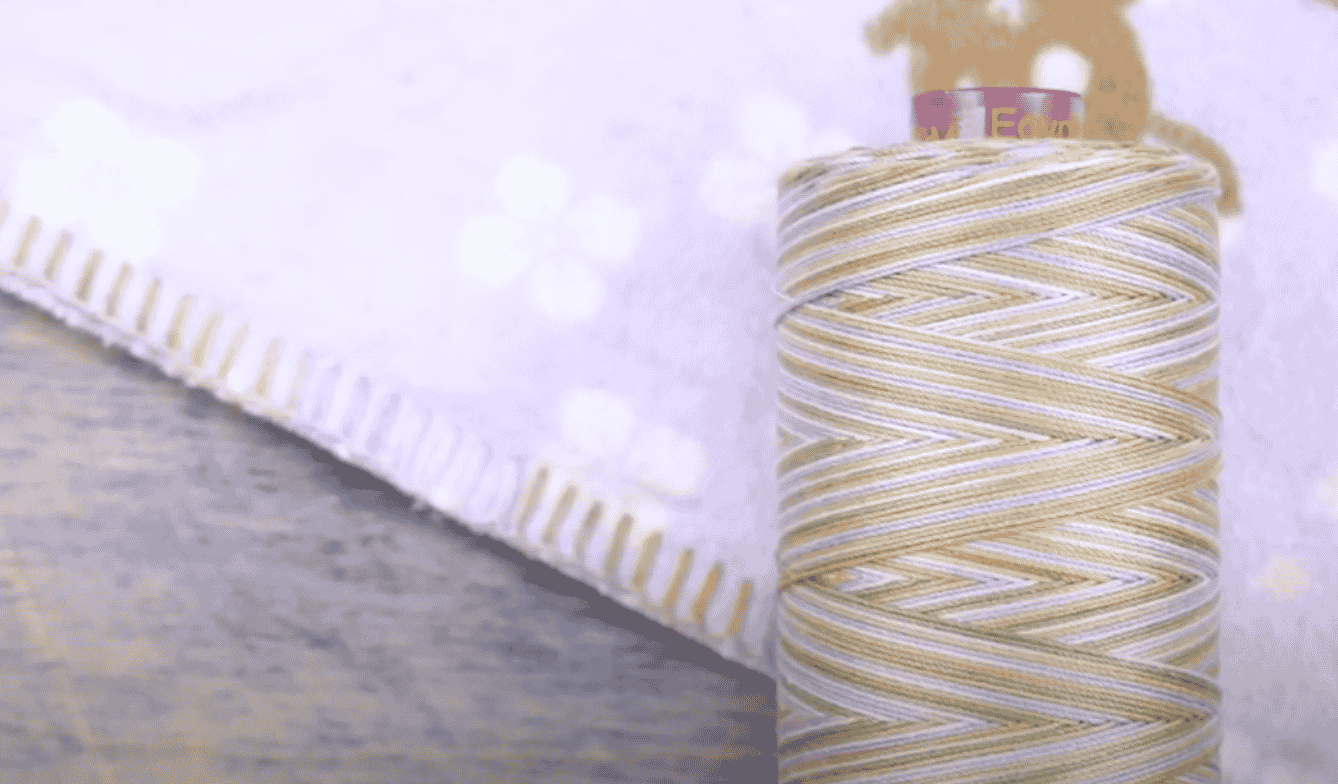
A bold thread will have the best effect for this stitch, so we’ll be using a 12wt variegated cotton called Fruitti in the needle. This thread has been double gassed, resulting in a very low lint finish, so the stitches will look clean and beautiful when it stitches out. Another option is 12wt Spagetti which is the same thread as Fruitti, but comes in solid colors.
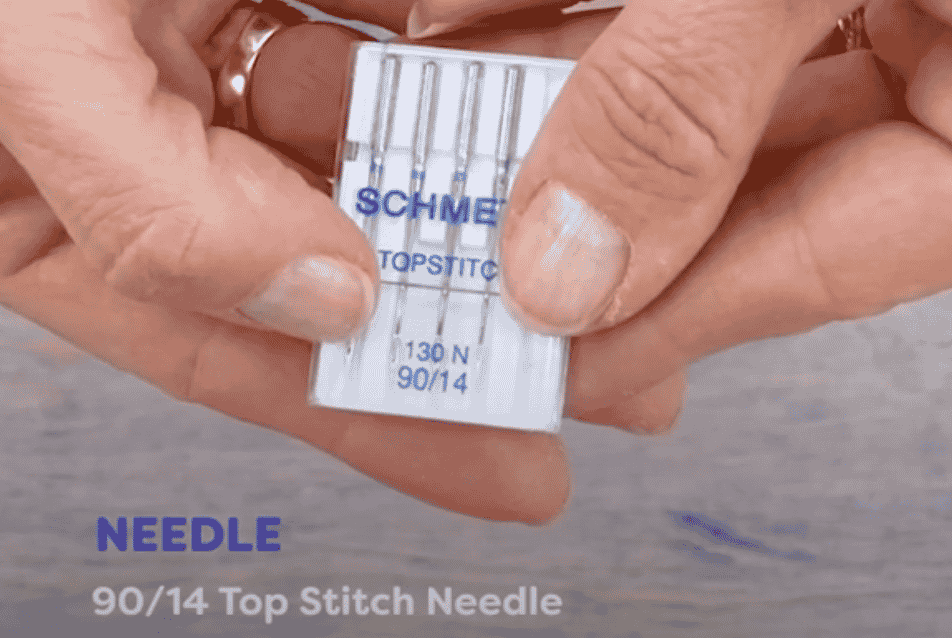
You’ll need a 90/14 topstitch needle in the serger to accommodate the heavier thread.
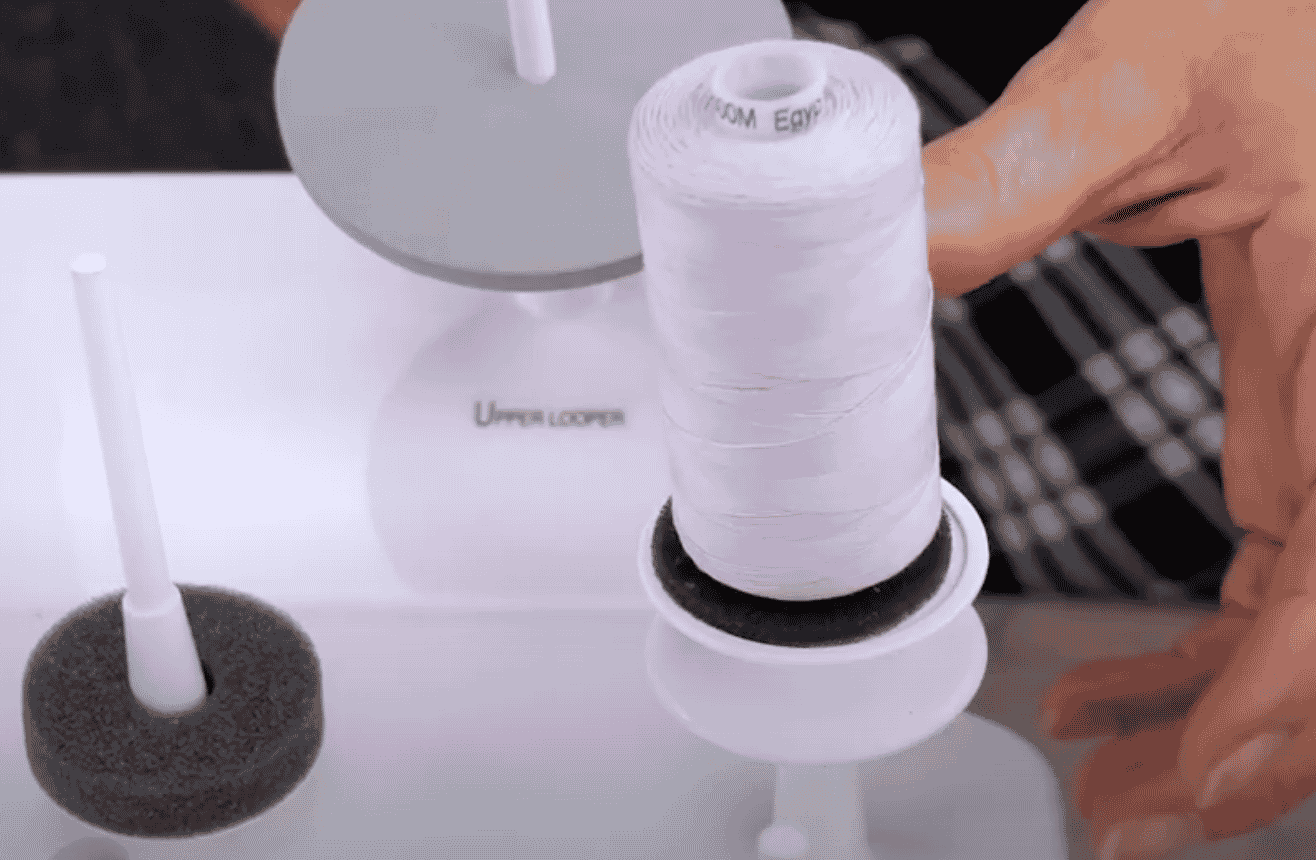
In the loopers, we’ll be using this medium 50wt cotton thread called Konfetti in a colour that matches the blanket. The finer weight works well with the heavier Fruitti thread.
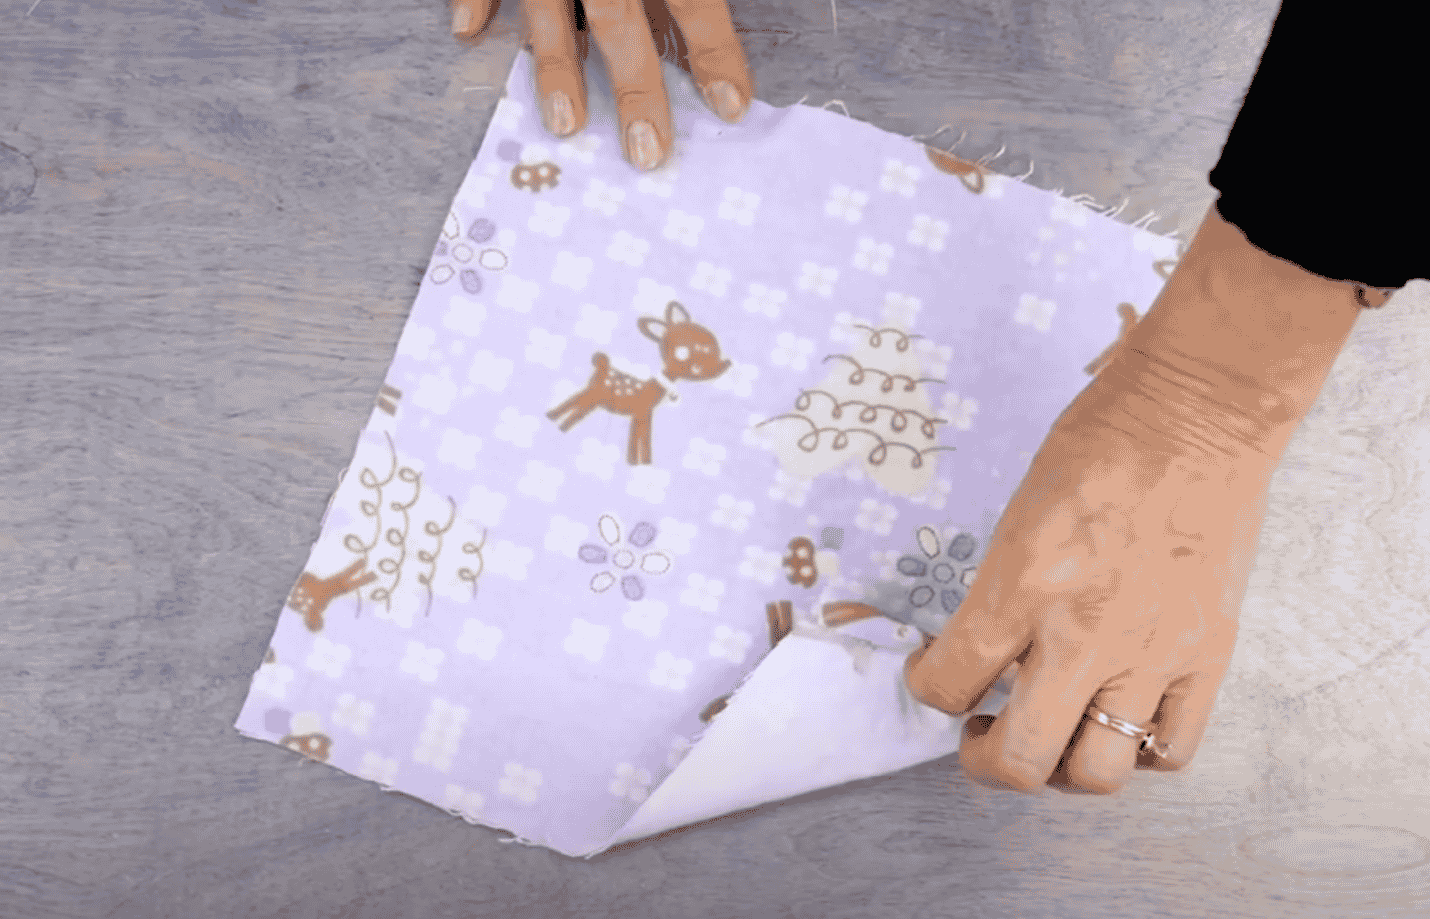
For the blanket, we’re choosing this cotton flannel which is warm and soft to the touch. You can choose to do a single layer, a double layer, or a double layer with batting in the middle. Be aware to follow fire safety regulations when choosing fabric for babies.
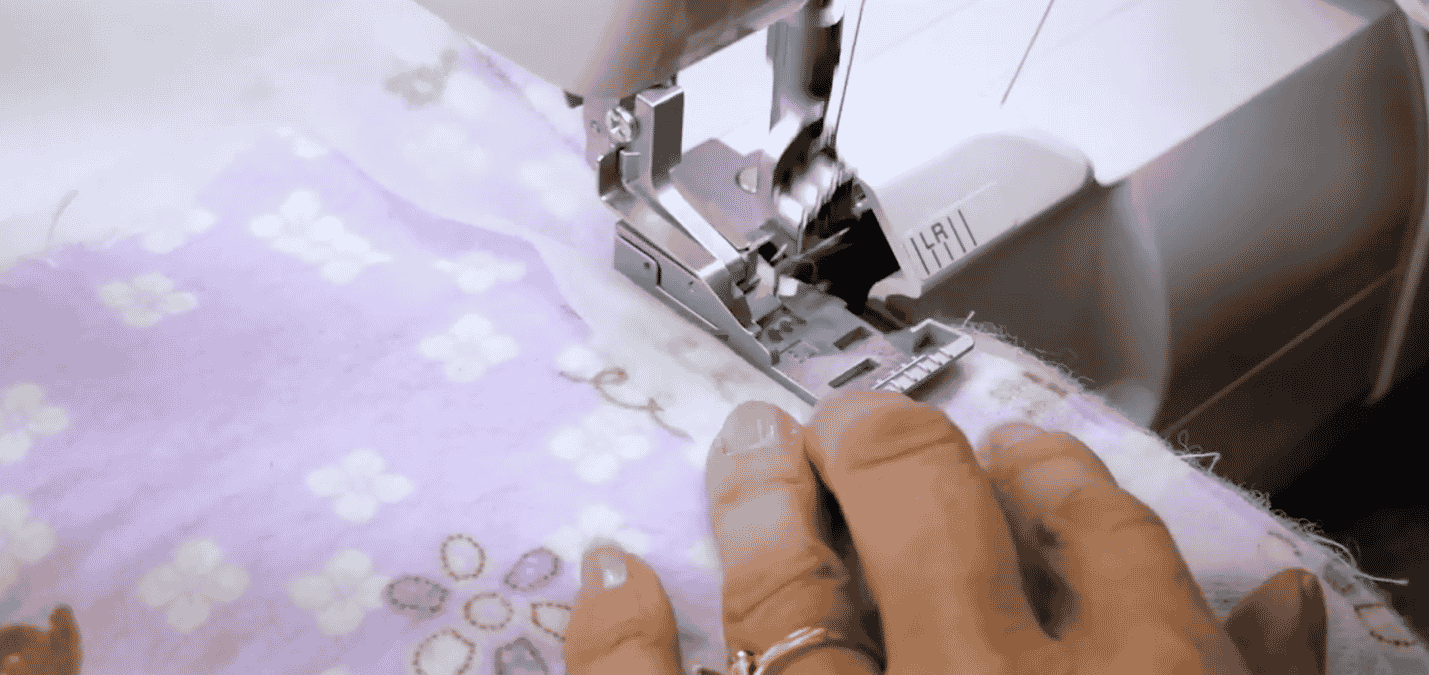
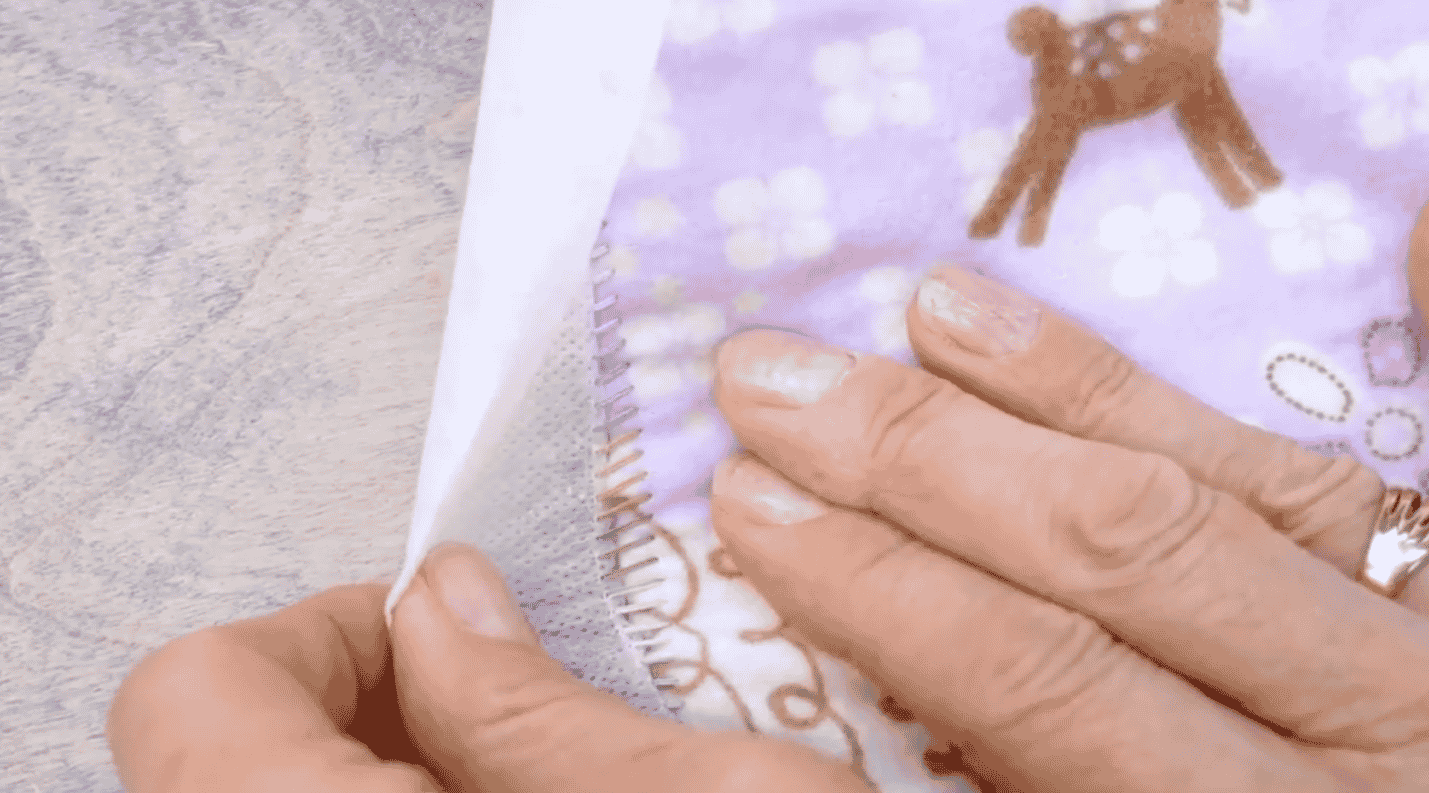
Before you begin, cut a length of water soluble stabilizer long enough to go around the edge of your blanket, with a width of about 3 inches. You can use pieces so you do not need one continuous length.
Set up the serger to do a 2 thread flatlock stitch, with a wide cutting width. Place a strip of the wash away stabilizer along the right edge of the blanket and stitch along the edge of the fabric. The stabilizer will lay on top of your project. Continue around the circumference of your blanket, making sure the knife of the serger is cutting off a small strip along the edge as you sew.
When you have finished going around all four edges, remove your work from the serger, leaving a tail to finish off.
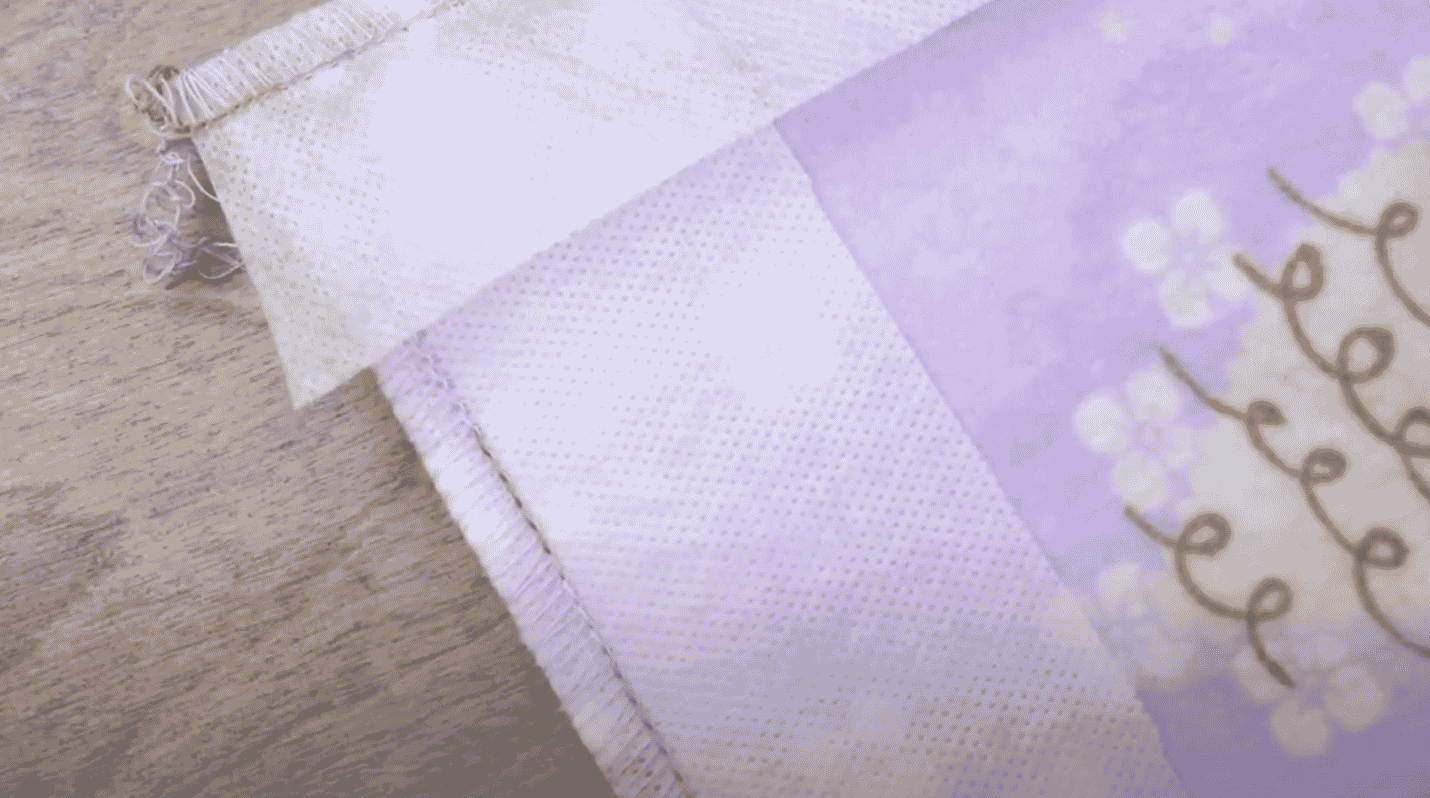
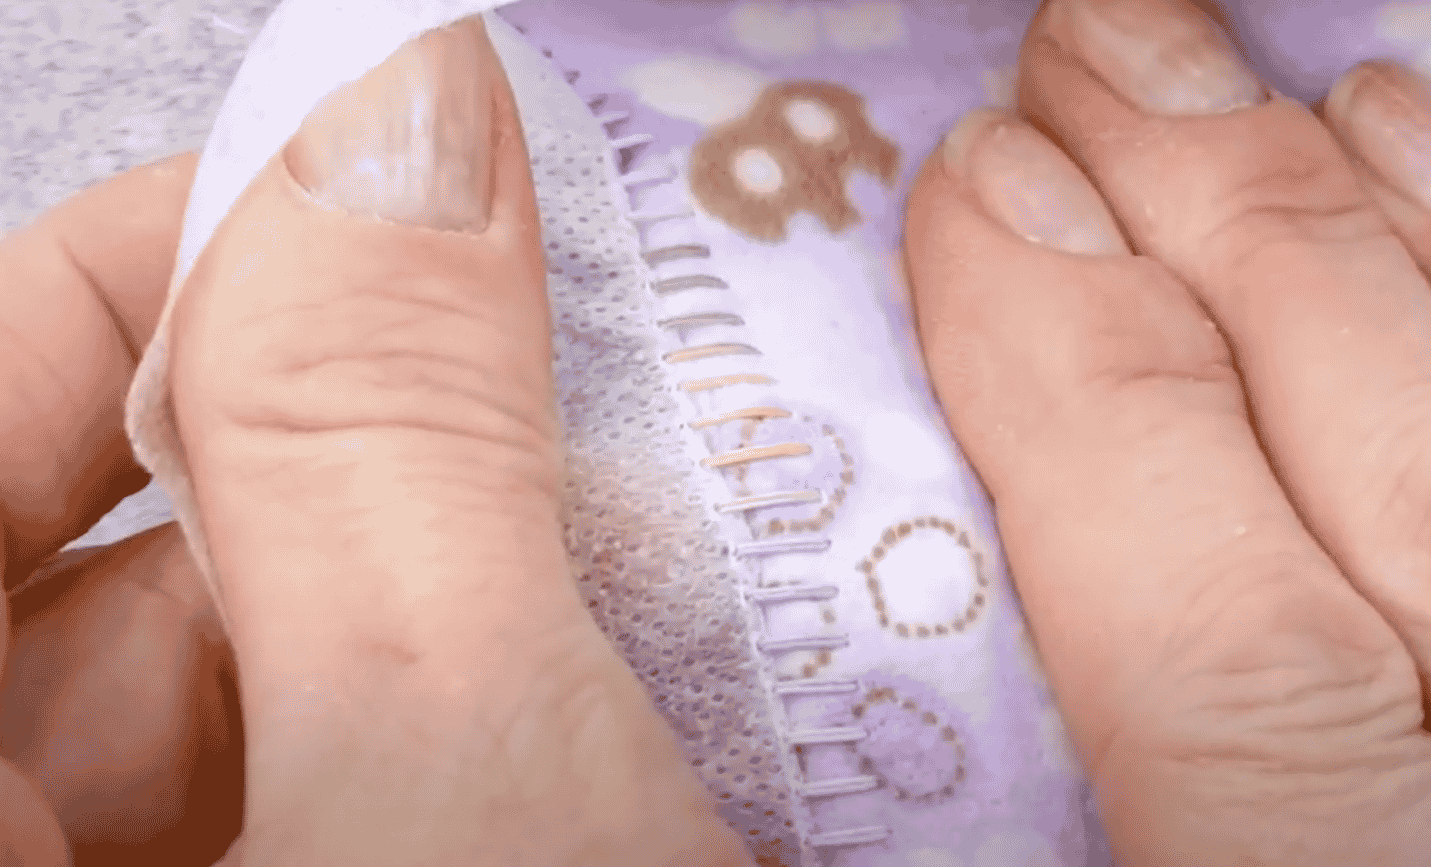
Tug on the wash away stabilizer all the way around to pull the stitches to the back and leave a “blanket stitch”. Trim the stabilizer close to your stitching, taking care not to cut into your serger threads. Rinsing the finished project will remove the remaining water soluble stabilizer.
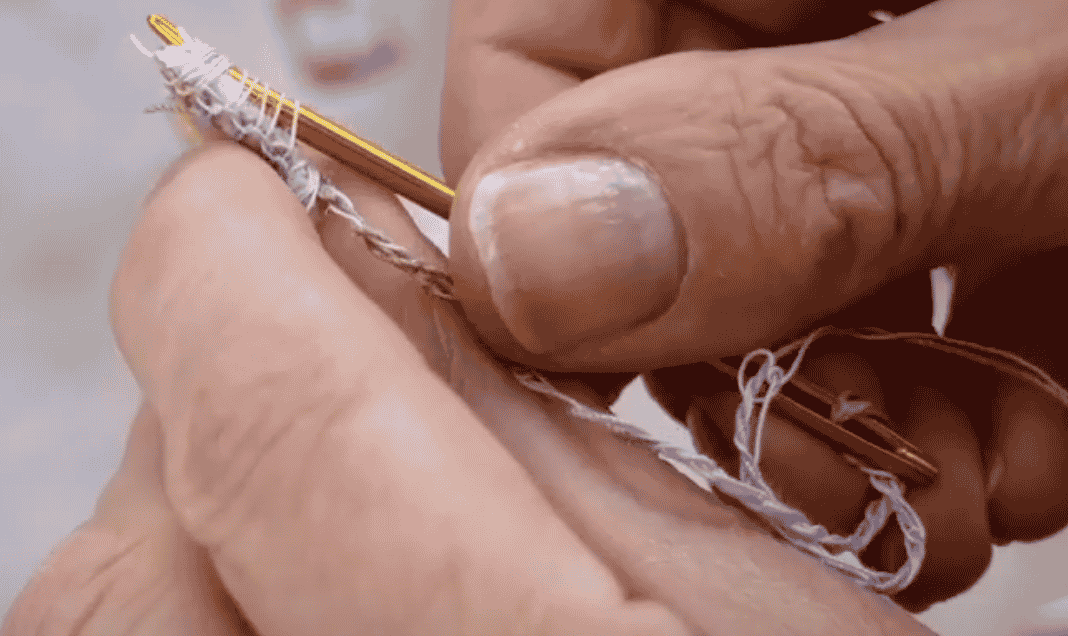
Weave the thread ends into your edging using a large eye needle. A drop of fray check will prevent them from unraveling later.
If your blanket is rectangular, you will go off the edge at each corner. After you have finished your piece, you will need to go back and weave in the serger threads at each corner to finish.
If you make the corners of your project a slow curve, you will not need to finish loose ends at each corner. In this case, begin your stitching line along one edge, not on a corner. When you come to the end, you will need to overlap your starting stitches, then slowly edge your way off the fabric, trying not to create a ‘point’. You will have only one set of loose threads to weave in.
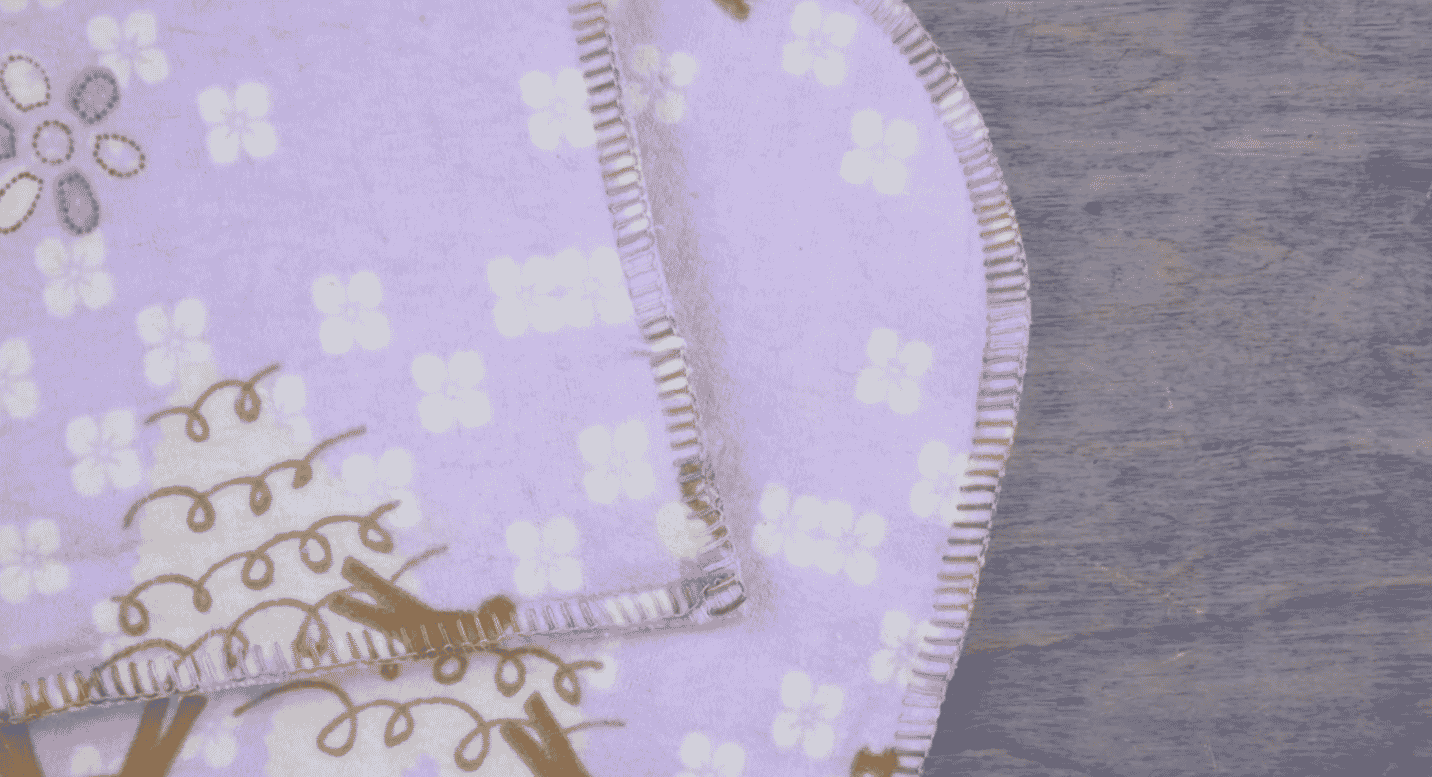
And that is all there is to it! In minutes you will have a nicely finished blanket! This is perfect for making receiving blankets for babies, a simple blanket for yourself or your family, or quickly finishing the edges of a project off.