
¡Es un problema con el que toda costurera puede identificarse! Todos hemos pasado por eso, pero ¿cómo saber qué está causando que se rompan tus hilos? ¡Aquí tienes 5 consejos para ayudarte rápidamente a identificar y resolver este problema común de costura!
Consejo #1: Tamaño y tipo de aguja
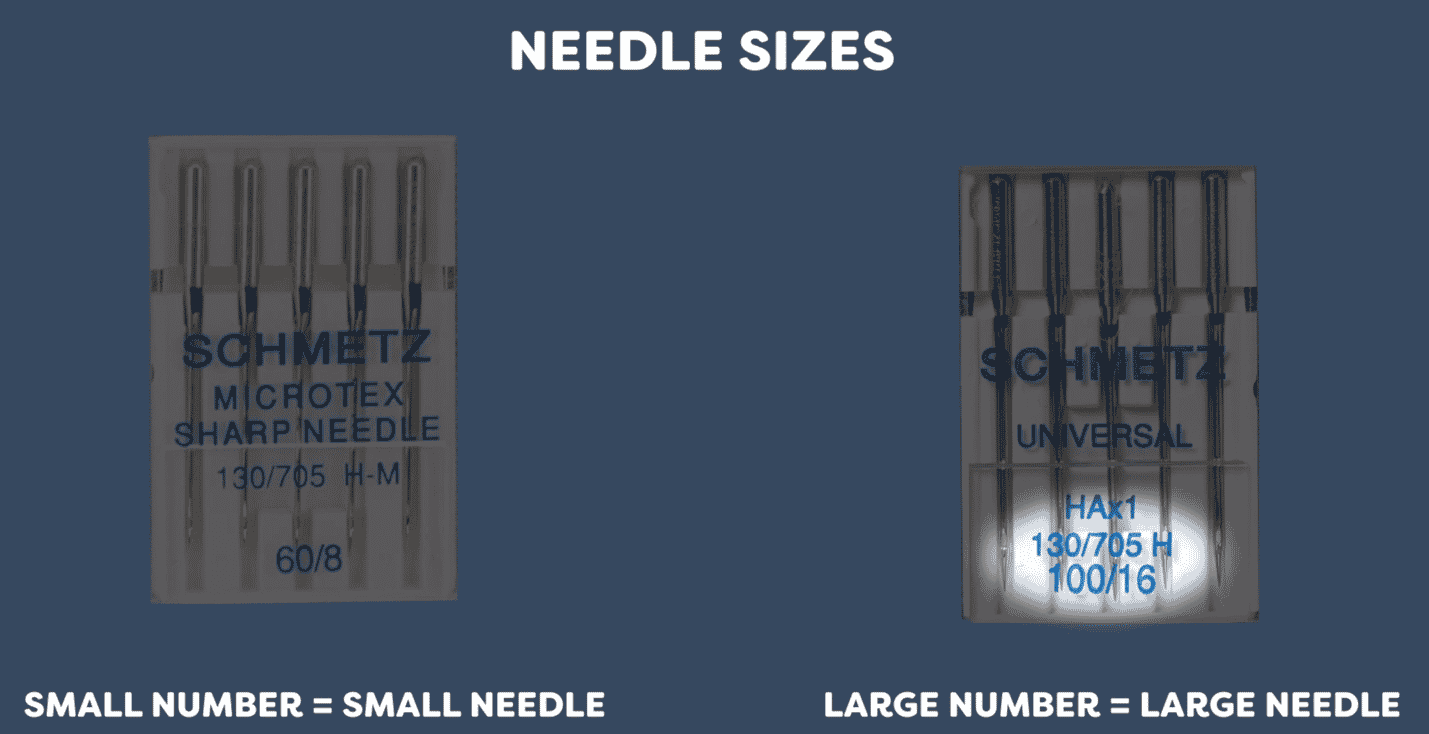
Como regla general, siempre es una rutina importante revisar las agujas de tu máquina. A menudo, un problema de rotura de hilo ocurre cuando tienes la aguja incorrecta. Antes de coser, asegúrate de que tu aguja sea del tamaño correcto para el hilo con el que estás cosiendo en el proyecto. Tanto en tallas americanas como europeas, cuanto menor sea el número que se muestra en el paquete, menor será la aguja. Lo mismo ocurre con los números más grandes. Las agujas más pequeñas son buenas para hilos más finos, como el de 80wt, y las agujas más grandes están diseñadas para hilos más pesados, como el de 12wt. Como referencia, un hilo mediano como el de 40wt o 50wt a menudo utilizará una aguja de tamaño 80/12.
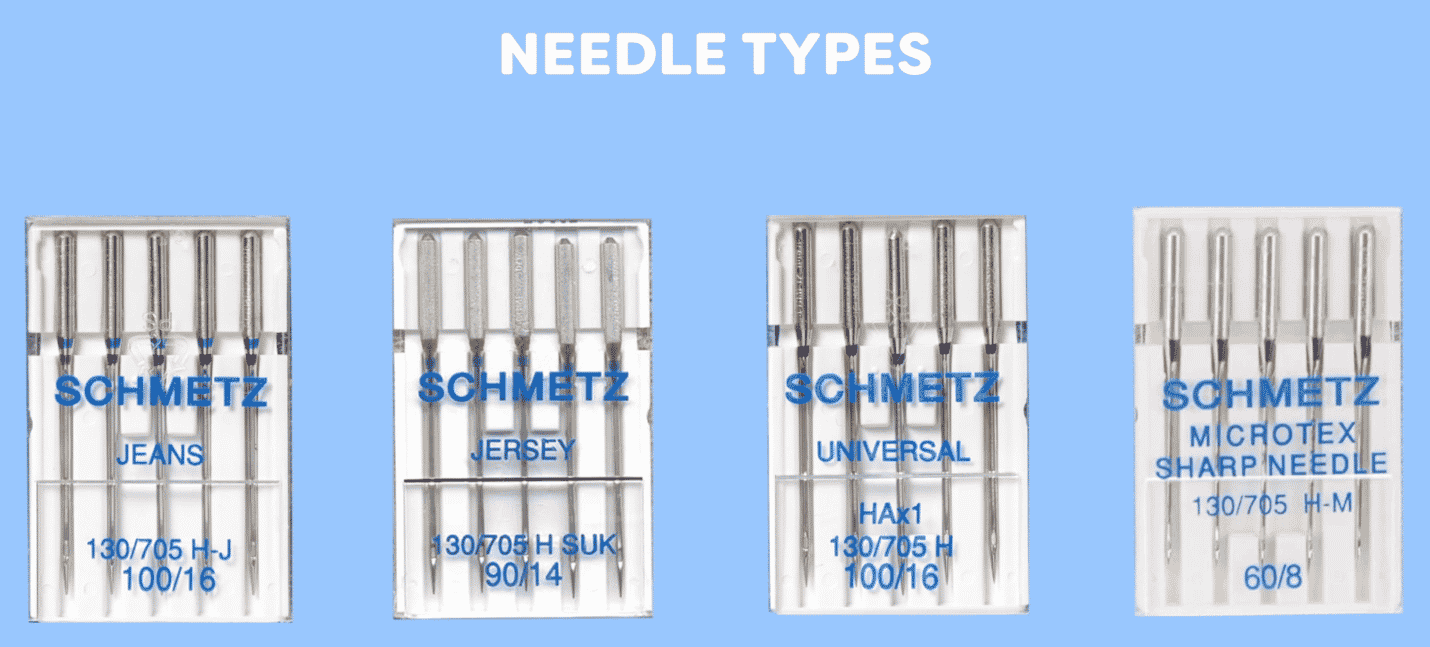
También debes asegurarte de tener el tipo de aguja correcto para la tela que estás cosiendo. Por ejemplo, usarías una aguja para mezclilla al coser tela vaquera gruesa. O una aguja de punta de bola con tela de punto. Todos los tipos de agujas tienen un propósito, ¡así que asegúrate de investigar lo que necesitas para lograr resultados óptimos!
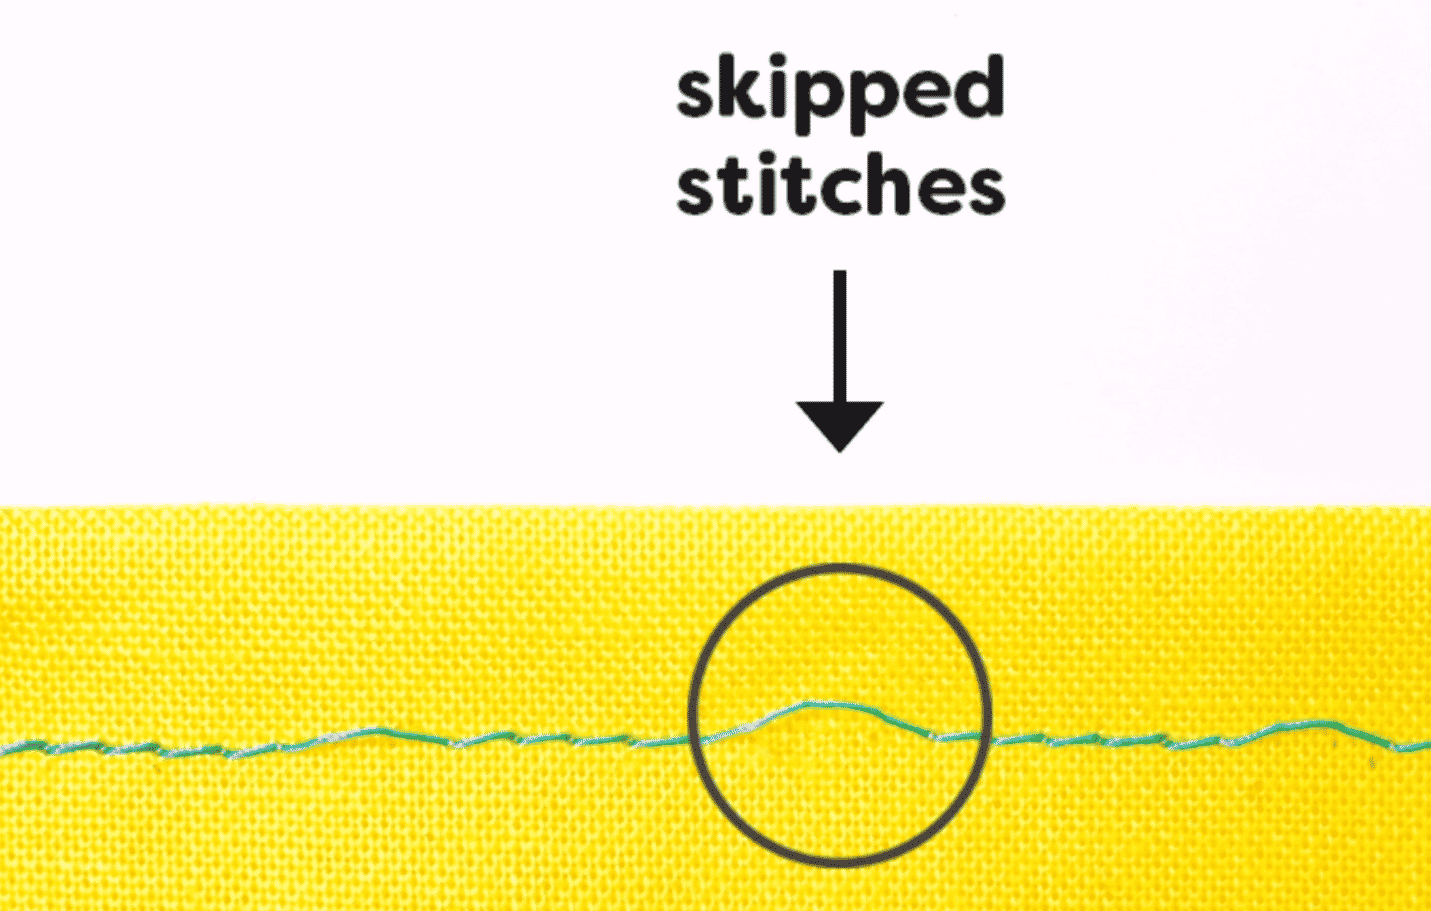
Es importante señalar la importancia de la aguja adecuada, ya que el tamaño y el tipo tendrán un gran impacto en el éxito de tu proyecto. El uso de una aguja incorrecta podría ser la causa de puntadas saltadas y problemas de tensión que también provocarán roturas de hilo.
Consejo #2: Hilo de la canilla
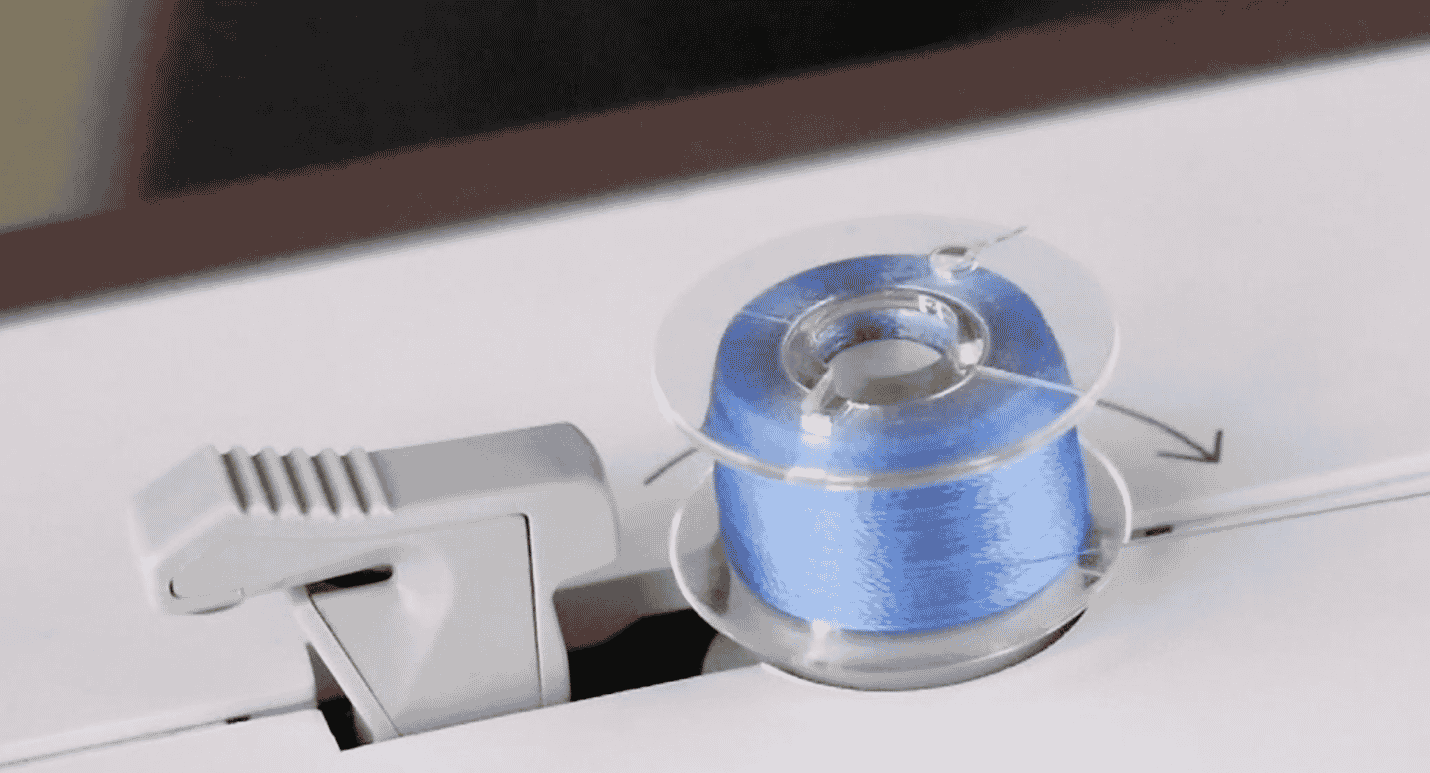
Otra causa de rotura de hilo podría ser el hilo de la canilla. Algunos hilos de canilla de menor calidad dejarán pelusas, motas o residuos de adhesivo que pueden interferir con el funcionamiento de la máquina. Debes revisar la carcasa de la canilla y sus alrededores, ya que el hilo podría estar atascado, enredado o funcionando incorrectamente como resultado de ello. Como resultado, siempre recomendamos encarecidamente utilizar una canilla que no tenga pegamento ni residuos. Los hilos que tienen residuos aplicados se sentirán ligeramente pegajosos al tacto. Por ejemplo, las canillas sin lados se mantienen unidas con pegamento para mantenerlas en su sitio.

Si enrollaste la canilla tú mismo, ten cuidado de no sobreenrollar la canilla. Esto puede suceder fácilmente con hilos de canilla más finos, ya que el mecanismo de auto-parada de la máquina no siempre detecta el hilo más fino de inmediato. Si enrollas tu propia canilla, te recomendamos detenerte un poco antes del borde de la canilla para evitar esto.
Siempre recomendamos usar un hilo de canilla más fino, como DecoBob 80wt, para lograr mejores resultados de tensión. Debido a que el hilo inferior es más pequeño, reducirá el volumen en la tela y siempre cederá al hilo superior, lo que significa que tus hilos no lucharán por la tensión en la máquina.
Consejo #3: Tensión
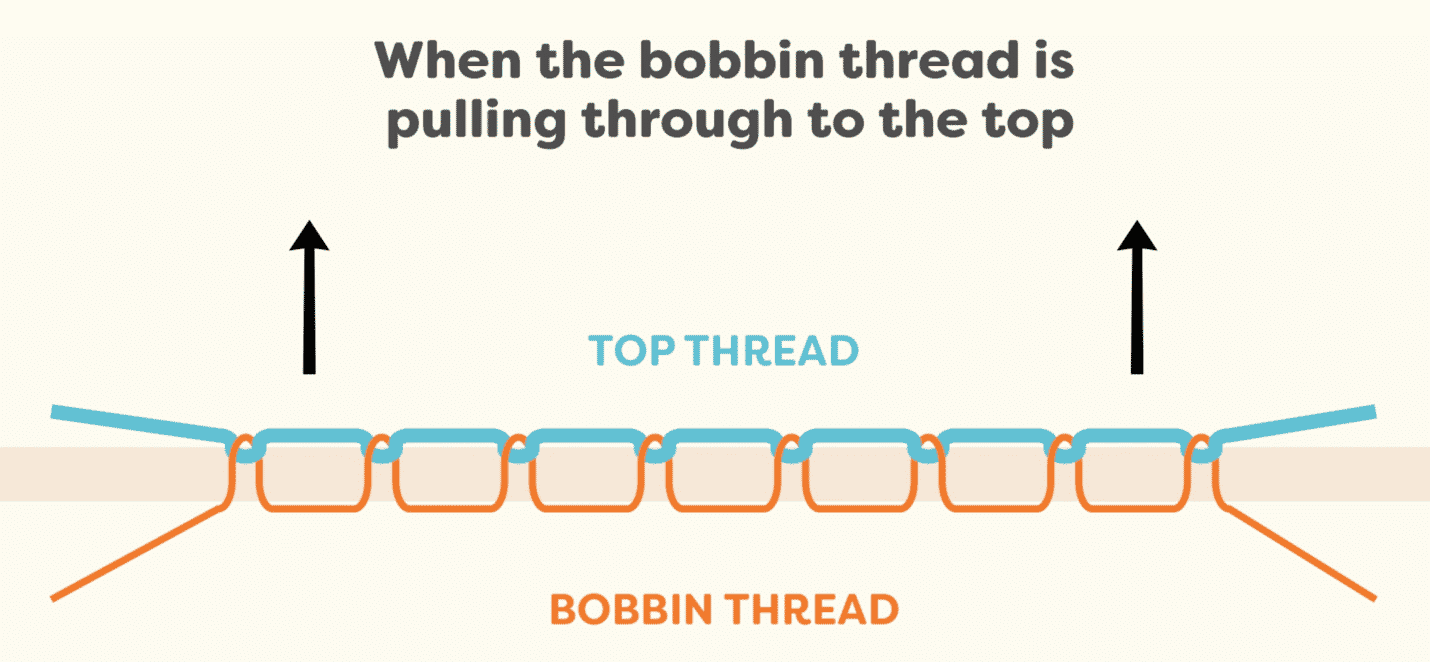
Este es siempre un factor importante a considerar al coser. Las roturas de hilo pueden ocurrir si la tensión es demasiado apretada tanto en la parte superior como en la inferior. Siempre recomendamos coser una tira de prueba en un trozo de tela para verificar la calidad de la tensión antes de comenzar tu proyecto. Si ves que el hilo de la canilla se sube a la parte superior, significa que la tensión superior está demasiado apretada y debe aflojarse.
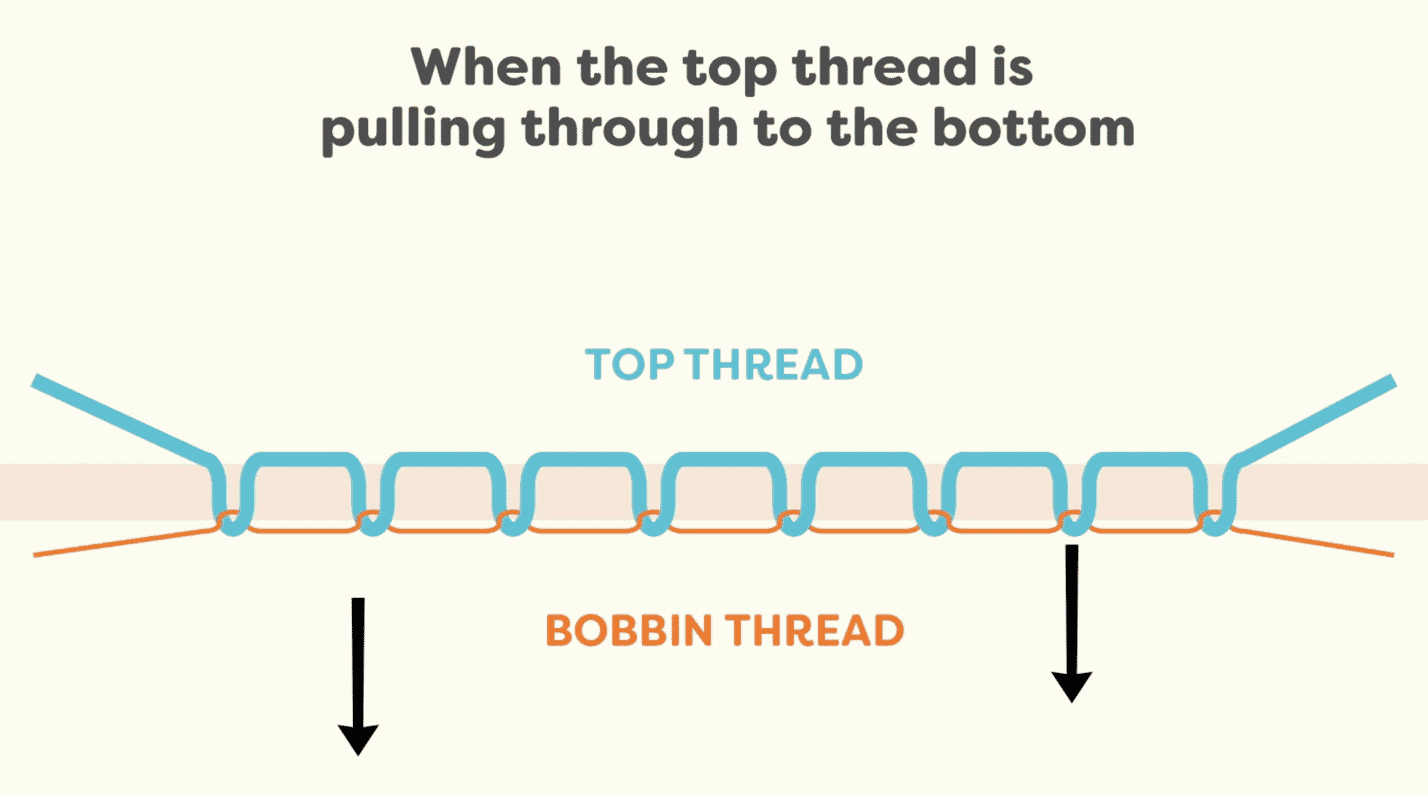
Si ves que el hilo superior se sube a la parte inferior, significa que la tensión de la canilla está demasiado apretada y debe aflojarse. Cada máquina es diferente, al igual que factores como el tipo y el peso del hilo que estás usando, la tela que estás usando, el bateo y el estabilizador. Con tantas consideraciones diferentes en juego, lo mejor es coser siempre una pieza de prueba y ajustar la tensión según sea necesario.
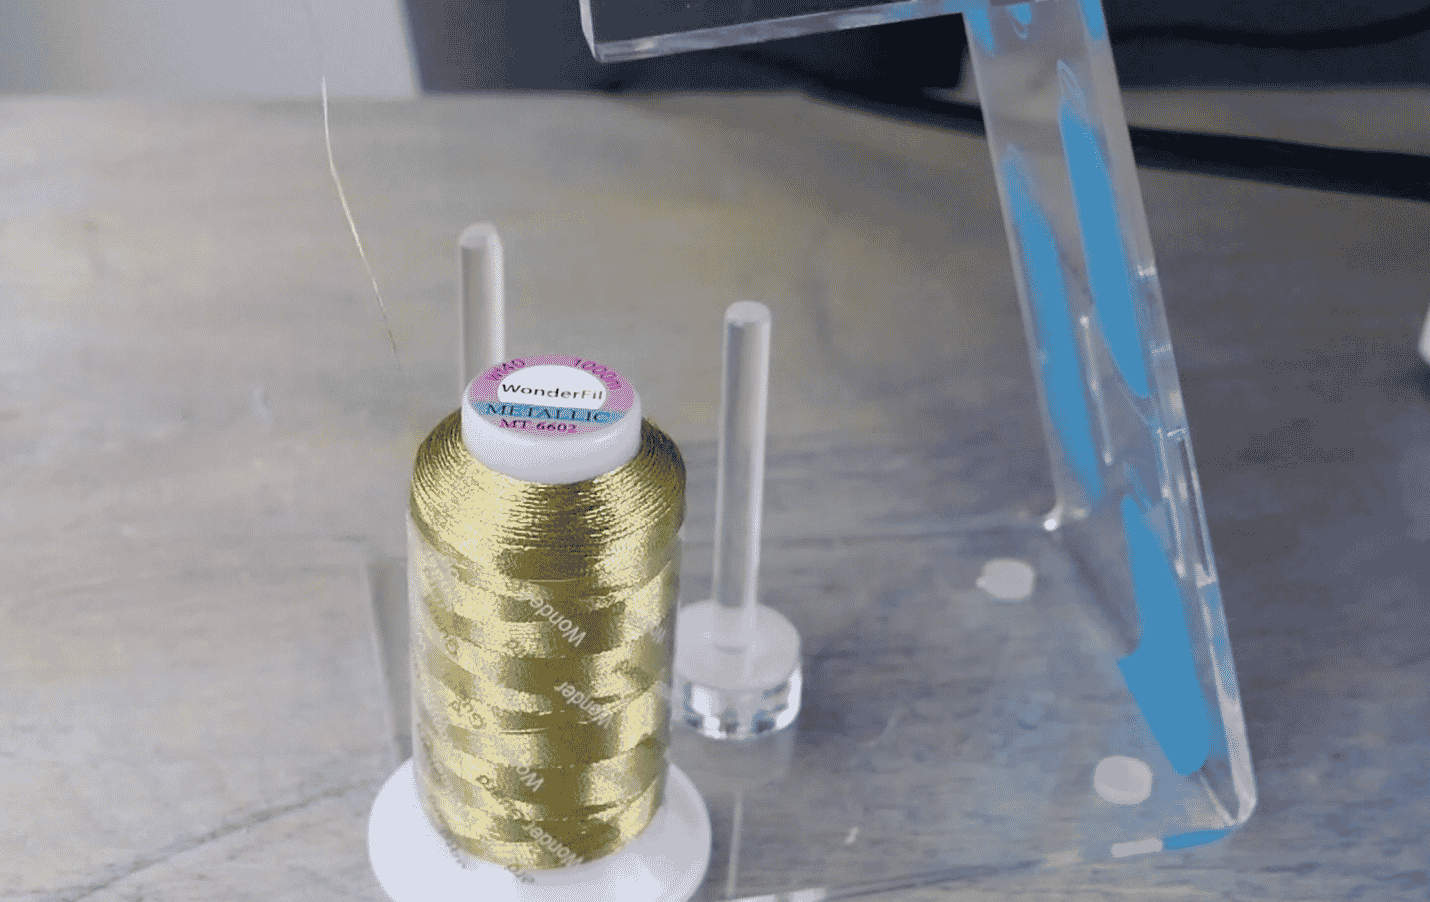
Consejo #4: Hilo de bobinado cruzado o de bobinado apilado
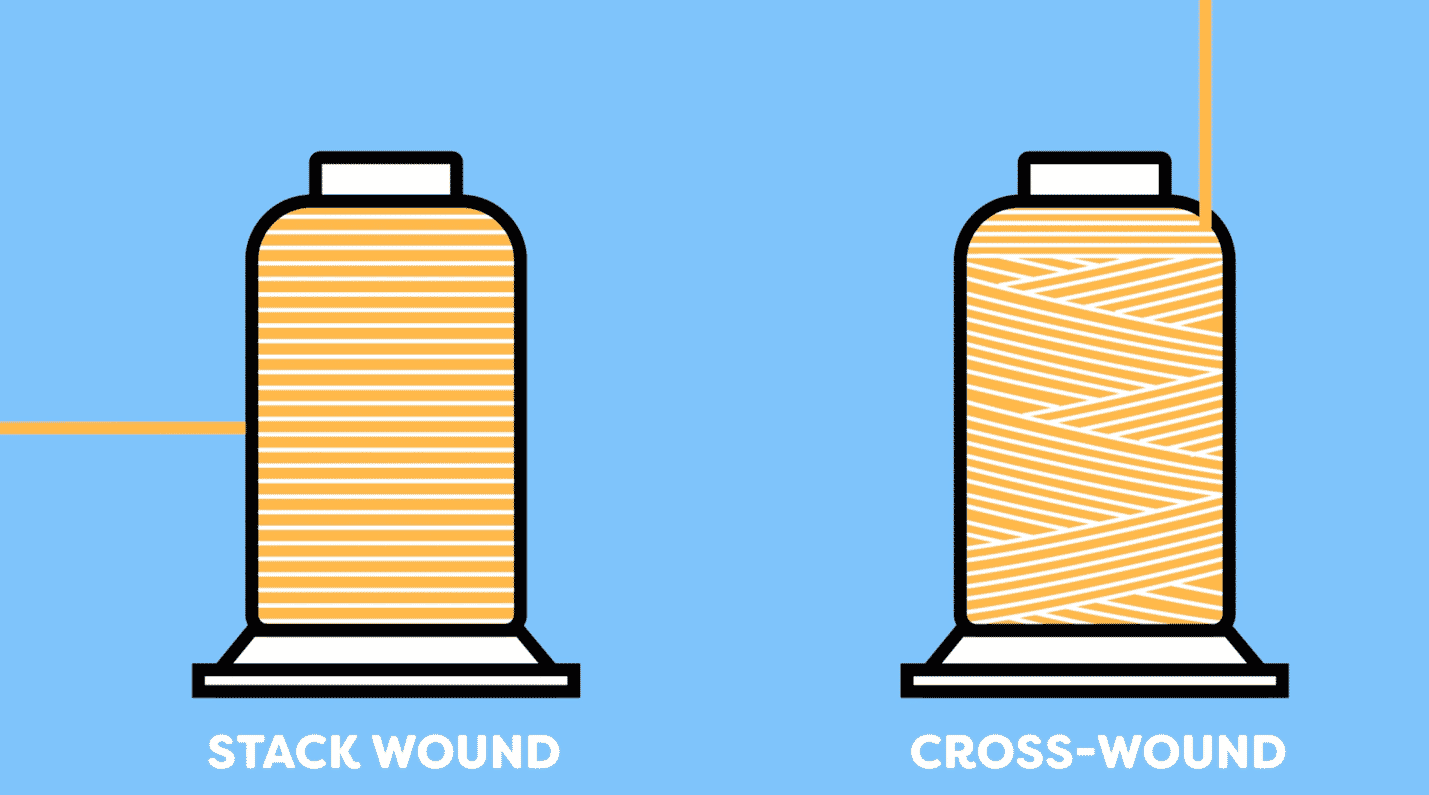
Si alguna vez has observado de cerca tus carretes de hilo, es posible que hayas notado que hay dos formas diferentes en que el hilo se enrolla en el carrete. El hilo bobinado apilado es cuando el hilo se enrolla en el carrete en un patrón recto y uniforme. El hilo bobinado cruzado es el más común de los dos y se enrollará en un patrón angulado. Si estás cosiendo con un carrete bobinado apilado, tu hilo deberá salirse por el costado del carrete. Esto se hace fácilmente colocándolo en el pasador de carrete vertical de tu máquina de coser. Si estás cosiendo con un carrete bobinado cruzado, entonces deberás sacar el hilo por la parte superior del carrete. Puedes hacerlo colocándolo en el pasador de carrete horizontal de la máquina. Colocar el carrete en el pasador equivocado hará que el hilo se arrastre por el carrete, lo que causará problemas de tensión y puede provocar roturas de hilo.
Consejo #5: Accesorios
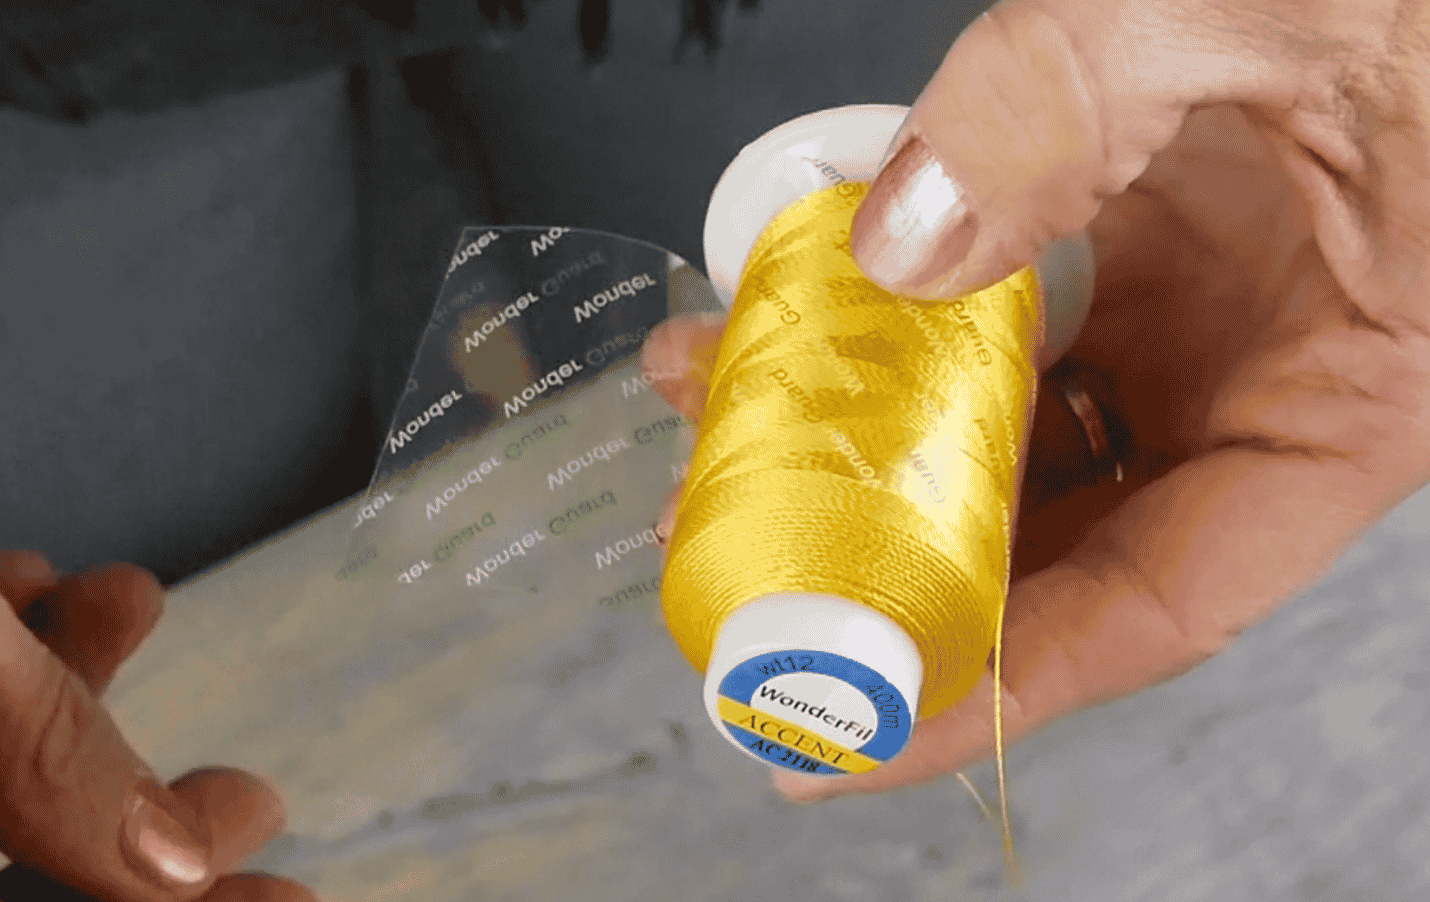
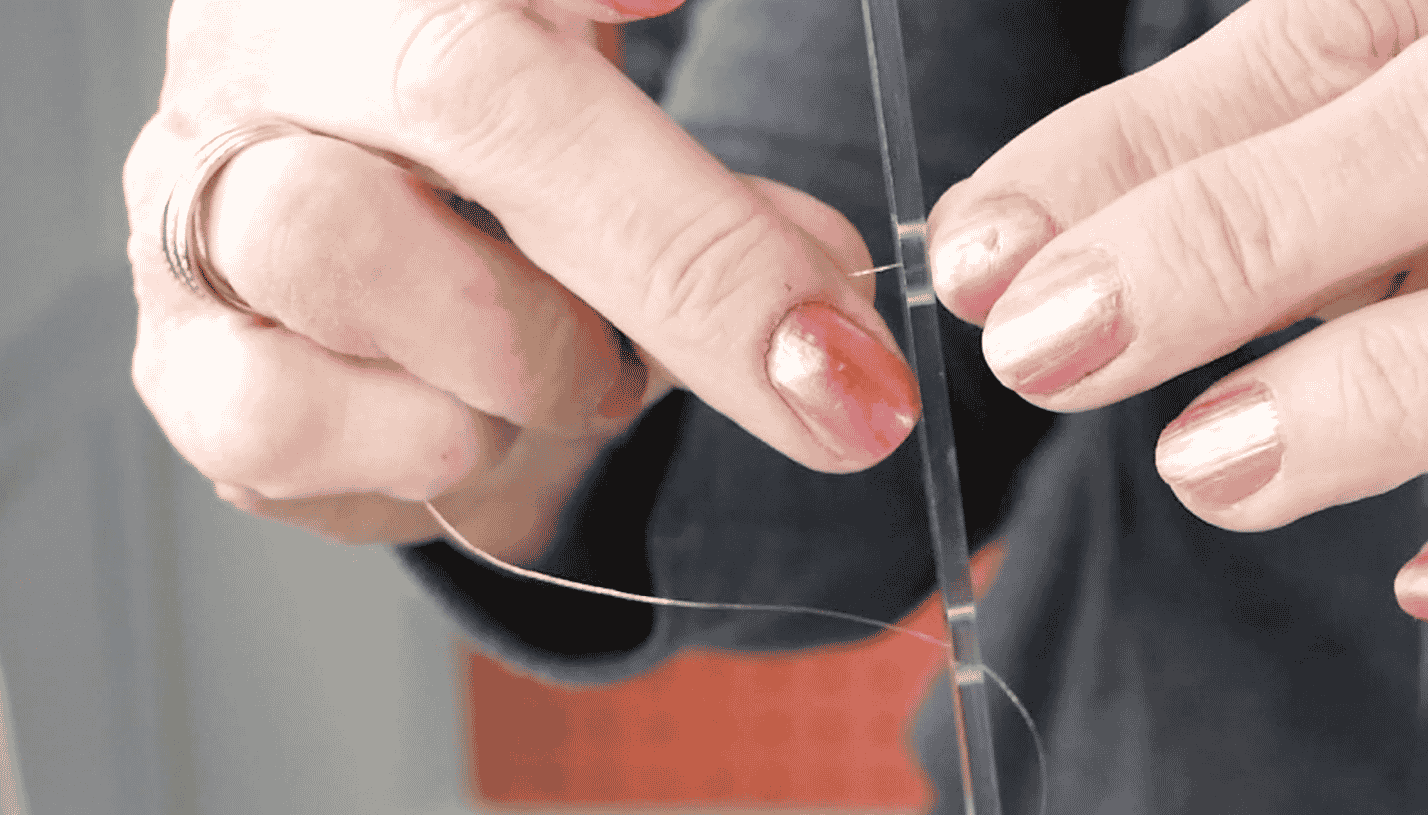
Si estás cosiendo con un hilo especial, es mejor considerar cómo algunos accesorios de costura pueden mejorar tu experiencia de costura. Si tienes un hilo resbaladizo que tiende a acumularse alrededor de la base de tu bobina, te recomendamos encarecidamente utilizar un Wonder Guard™. Envuelve este protector de hilo alrededor de la bobina para evitar que el hilo resbaladizo se deslice por la base del cono, lo que puede provocar que se enganche, se enrede y cambie la tensión de tu hilo, causando roturas de hilo.
Además, un Thread Tamer también es una excelente idea para hilos resbaladizos o hilos que se rizan, como el hilo metálico. Pasar el hilo por las múltiples ranuras ayudará a deshacer esos rizos de un hilo metálico y también le dará al hilo la oportunidad de relajarse antes de entrar en la máquina. Esto es un gran beneficio para los hilos resbaladizos y los hilos metálicos que tienden a tener estos problemas.
¡Esperamos que esto te ayude a comprender las causas de las roturas de hilo y las formas de prevenirlas!