
La técnica de paper piecing inglés es una técnica de costura a mano en la que la tela se envuelve alrededor de una plantilla de papel para crear un diseño preciso. Estas piezas se cosen a mano para formar un patrón que se puede usar en edredones, manualidades o para decorar cualquier proyecto de costura que desees.
Es ideal para diseños que no tienen lados rectos largos, sino que tienen numerosas esquinas insertadas, como hexágonos o diamantes. También es muy portátil, lo que significa que puedes trabajar en tu proyecto mientras viajas, y es maravilloso para la costura manual meditativa.
WonderFil ha creado un hilo popular que permitirá a los paper piecers tener las costuras más apretadas y planas posibles. Puede que hayas oído hablar de él. Se llama InvisaFil, y es un hilo de 100wt, lo que significa que es increíblemente fino. Desaparece casi por completo en la tela y, debido a que es tan delgado, permite que las piezas se asienten cómodamente una contra la otra.
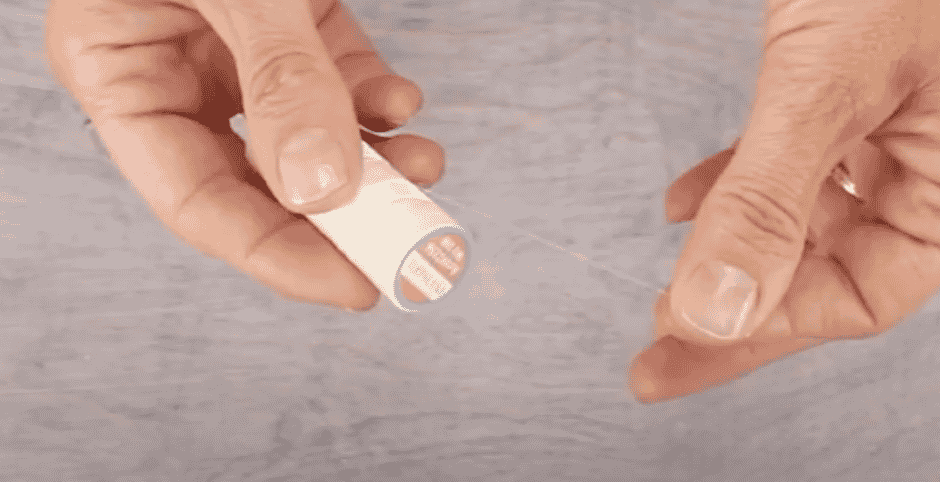
Dado que estamos usando un hilo tan fino, queremos usar una aguja con un ojo más pequeño. Una aguja de punta afilada del n.° 11 o n.° 12 funcionará bien, ya que el ojo es lo suficientemente pequeño como para que el hilo no se salga fácilmente.
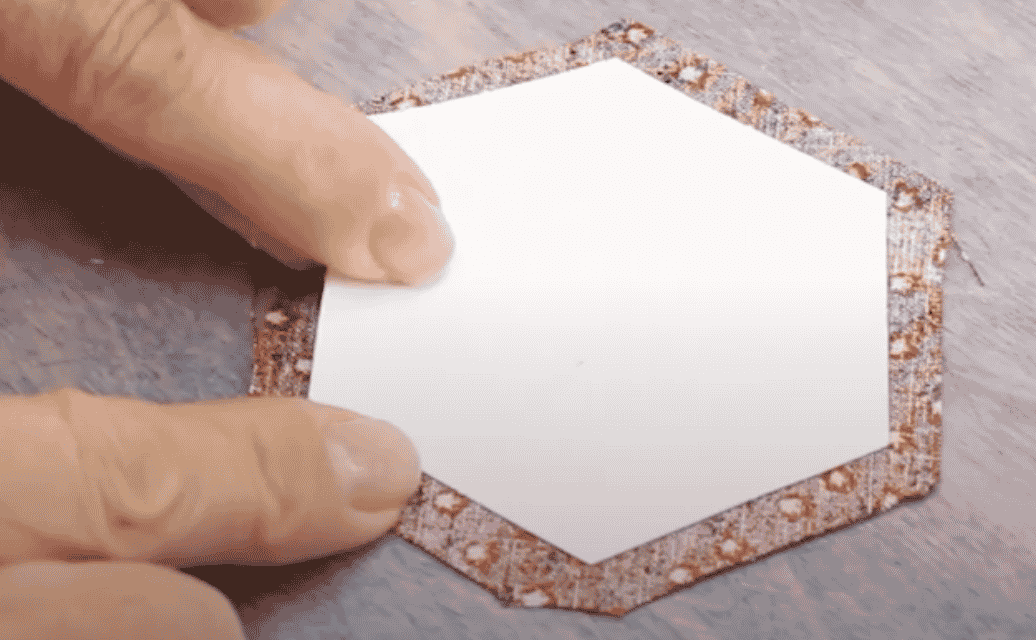
También querrás tu plantilla de papel, que se puede comprar precortada como estas, o puedes imprimir tu plantilla en cartulina y recortarlas. Las plantillas de paper piecing están disponibles en todas las formas y tamaños, pero hoy vamos a demostrar con el hexágono tradicional.
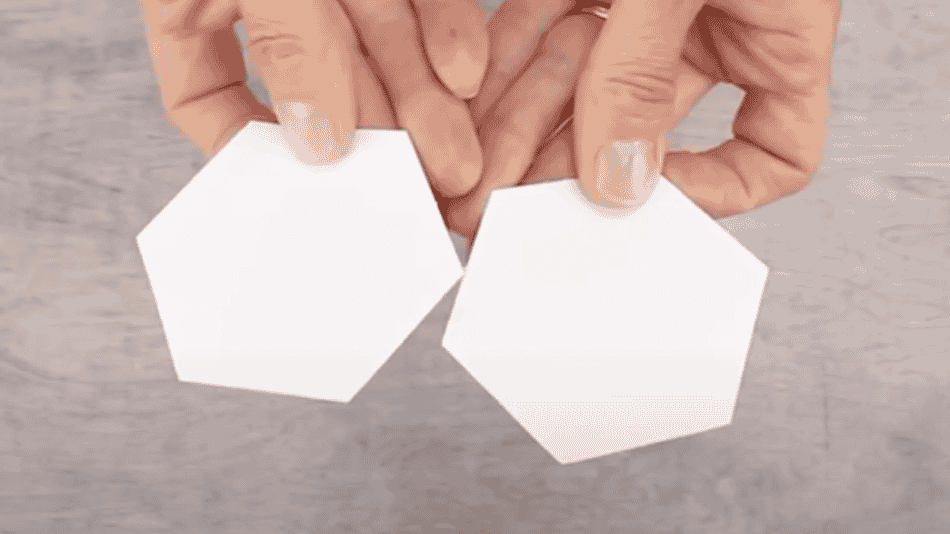
También necesitarás tu tela, que deberá cortarse más grande que la plantilla para permitir el doblez. Nos gusta cortarlas con un margen generoso de un cuarto de pulgada en cada lado.
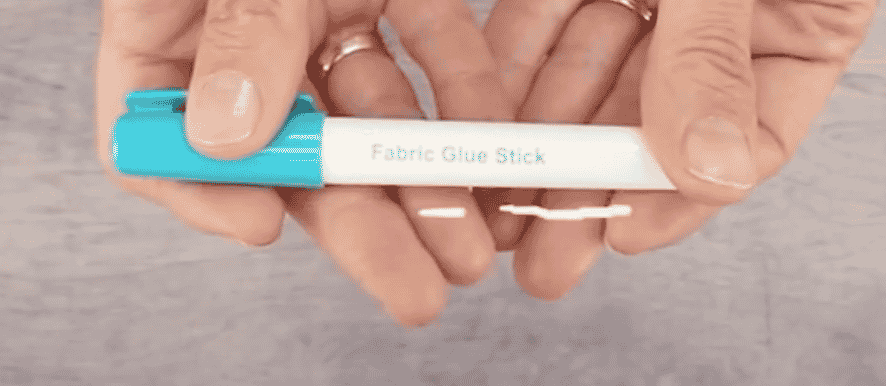
Como opción, a algunas personas les gusta usar pegamento para tela para dar forma a la tela alrededor de la plantilla. La ventaja del pegamento es que es bastante fácil preparar las piezas. La desventaja es que es un poco más difícil quitar el reverso de papel una vez que las piezas se han unido. La alternativa es hacer pequeñas puntadas en la tela detrás de la pieza, así que demostraremos ambos métodos para que puedas elegir el mejor para ti.
Ahora, para empezar, vamos a preparar los hexágonos. Aquí están nuestra plantilla y nuestra tela, y puedes ver que hemos cortado la tela más grande que la plantilla. Primero, vamos a demostrar cómo usar pegamento para unir la tela al papel.
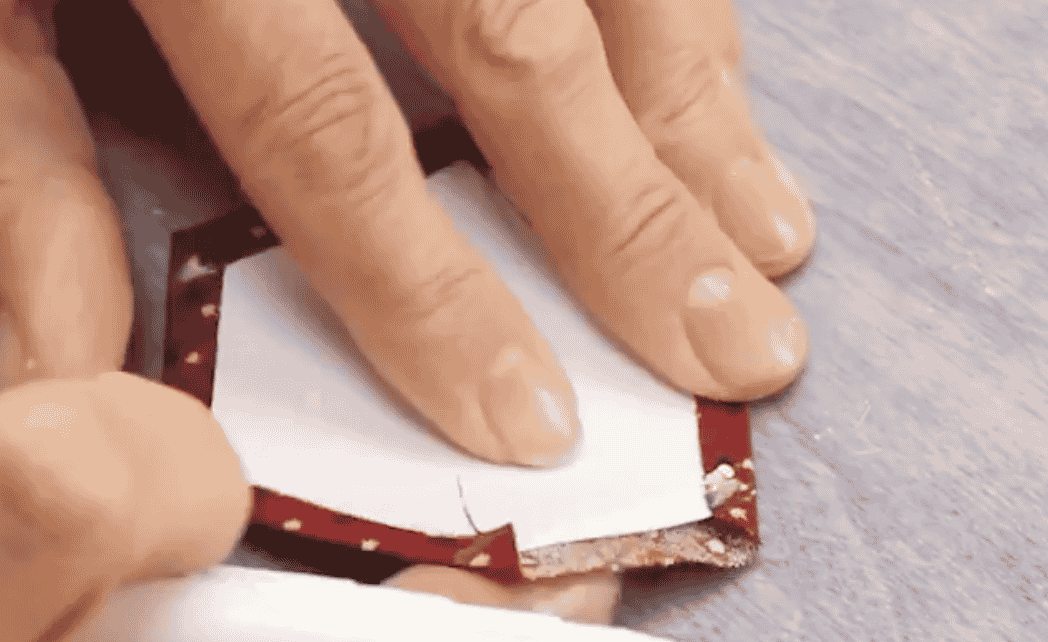
Coloca la tela con el lado derecho hacia abajo y centra la plantilla en la tela. Aplica una línea de pegamento a lo largo de un lado de la plantilla y presiona la tela, asegurándote de mantener la plantilla centrada y la tela bien envuelta sobre el borde.
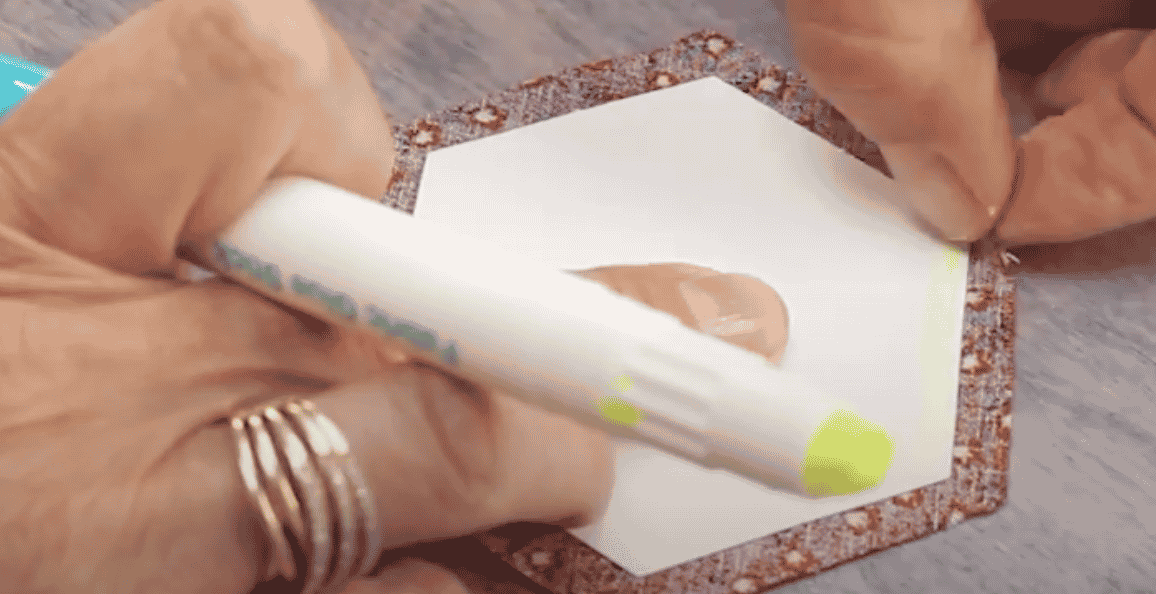
Ahora, aplica otra línea de pegamento a lo largo del lado de unión del hexágono, asegurándote de aplicar pegamento en la tela doblada del pliegue anterior. Empuja la esquina mientras presionas esta fila, manteniendo nuevamente la plantilla centrada y la tela firmemente doblada.
Continúe a lo largo de cada lado hasta que todos los lados estén asegurados.
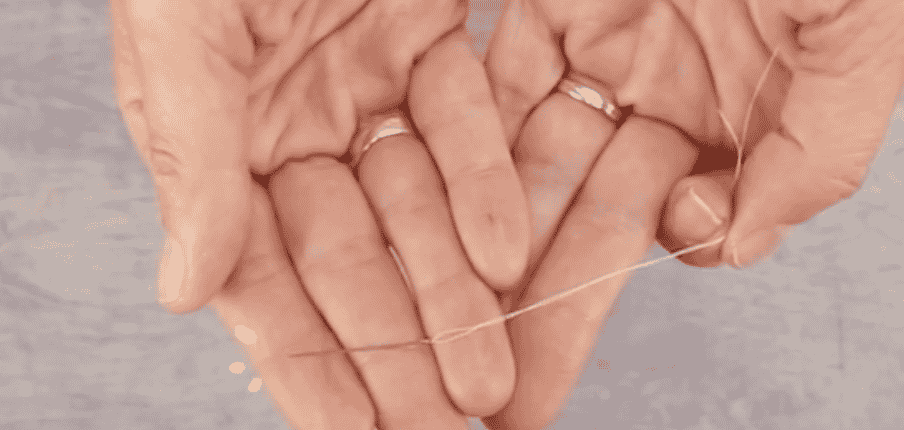
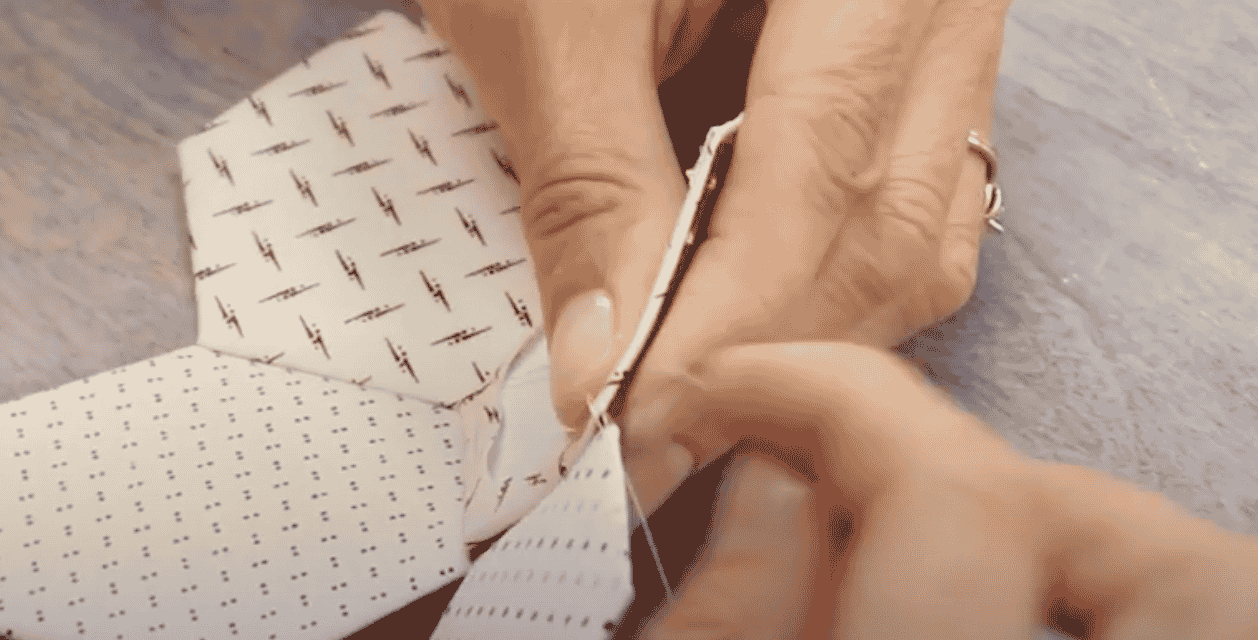
Ahora vamos a mostrarte cómo coser a mano la tela a la plantilla. Aquí está nuestra aguja enhebrada, y cuando usamos un hilo fino como InvisaFil, nos gusta hacer un pequeño nudo de mano en el hilo justo detrás del ojo de la aguja. Debido a que el hilo es tan fino, esto no impedirá la costura, pero evitará que el hilo se salga de la aguja.
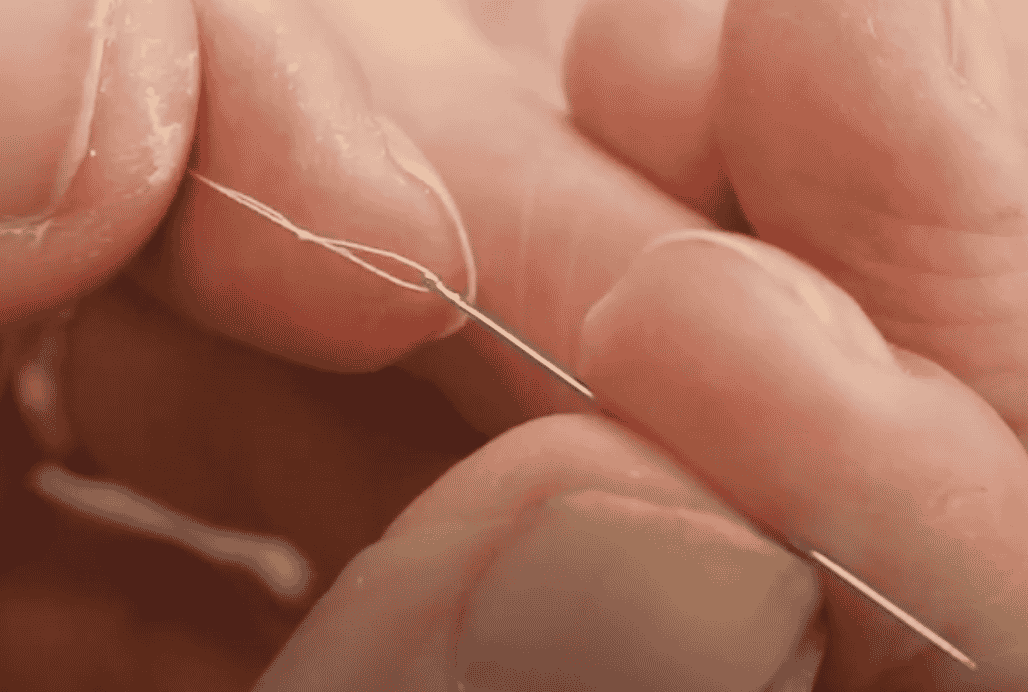
Ahora vamos a anudar el extremo del hilo con un buen nudo. Cuando des la primera puntada, ten cuidado de tirar suavemente para no sacar el nudo a través de la tela. Cuando des unas pocas puntadas en un mismo lugar, el hilo quedará seguro.
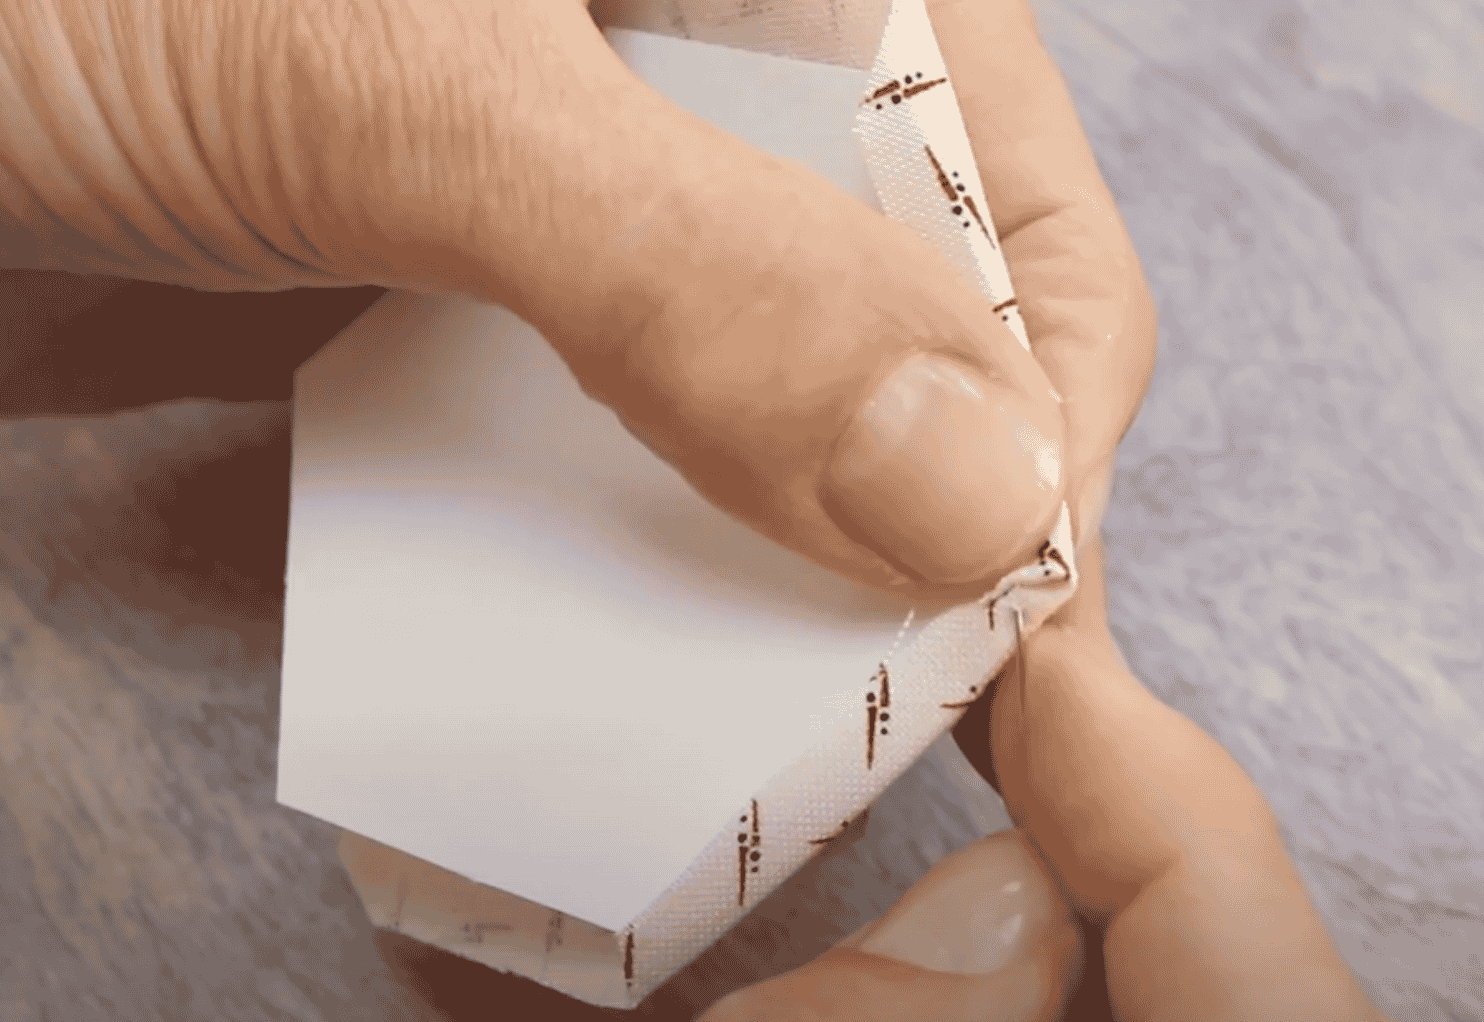
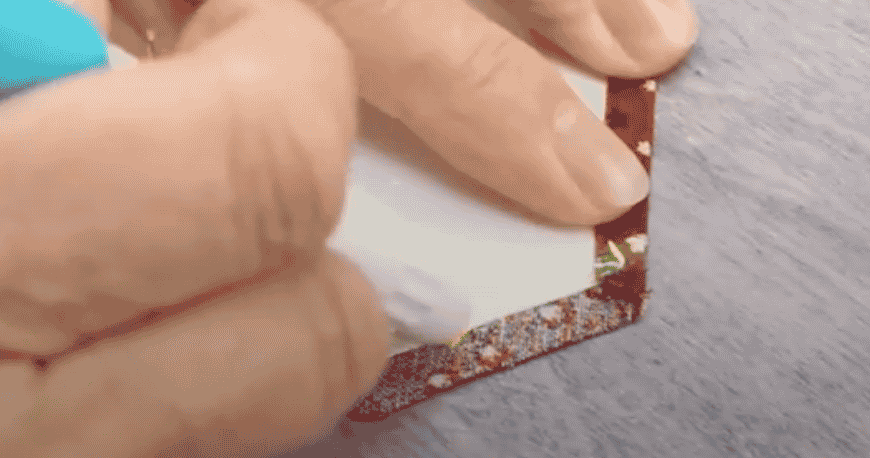
Primero, presiona un lado con el dedo, manteniendo la plantilla centrada. Ahora usa tu dedo para empujar la esquina y presiona el siguiente lado. Manteniendo la esquina presionada con el dedo, da unas pequeñas puntadas en la esquina usando una simple puntada de látigo.
Pasando a la siguiente esquina, repite este proceso. El hilo correrá a lo largo del lado del hexágono, paralelo al borde. Tira firmemente de las puntadas para mantener los bordes ajustados y continúa trabajando alrededor de la pieza hasta que los seis lados estén seguros.
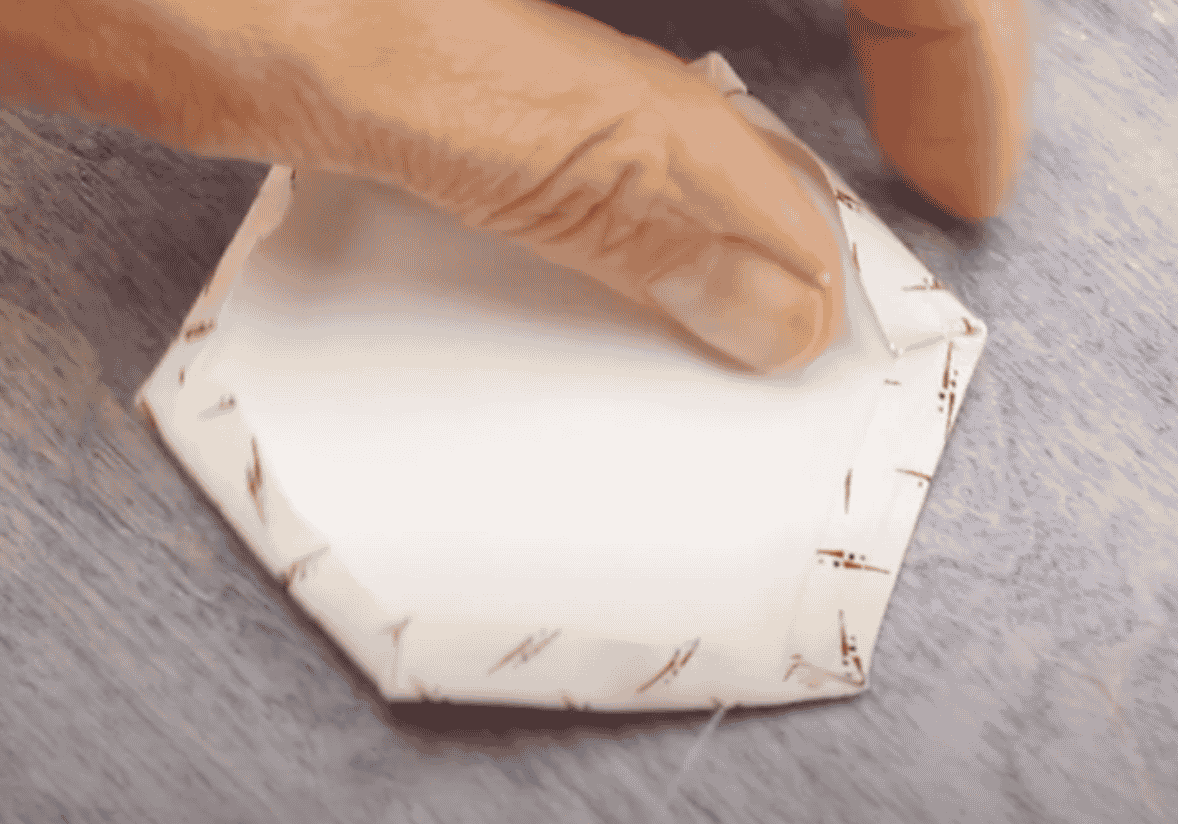
Cuando hayas terminado, da unas puntadas más pequeñas en la primera esquina, anuda el hilo y recorta.
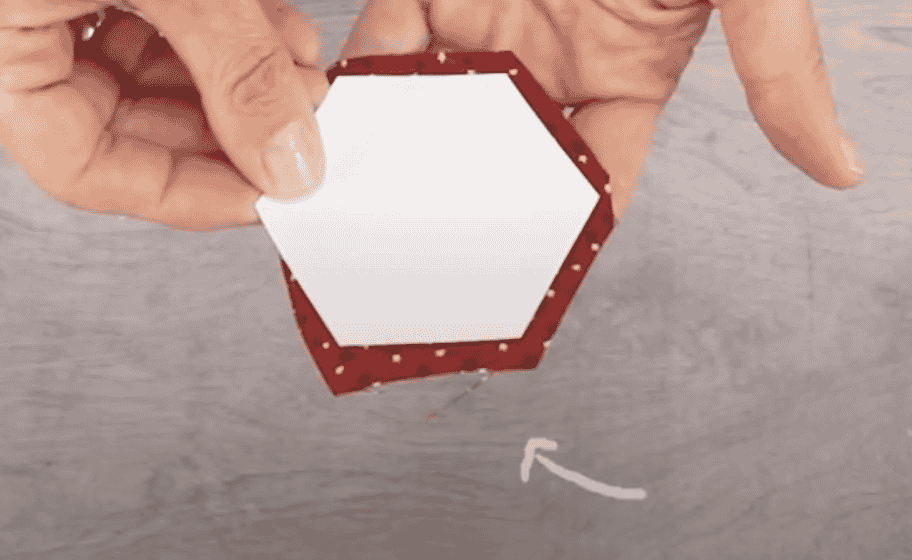
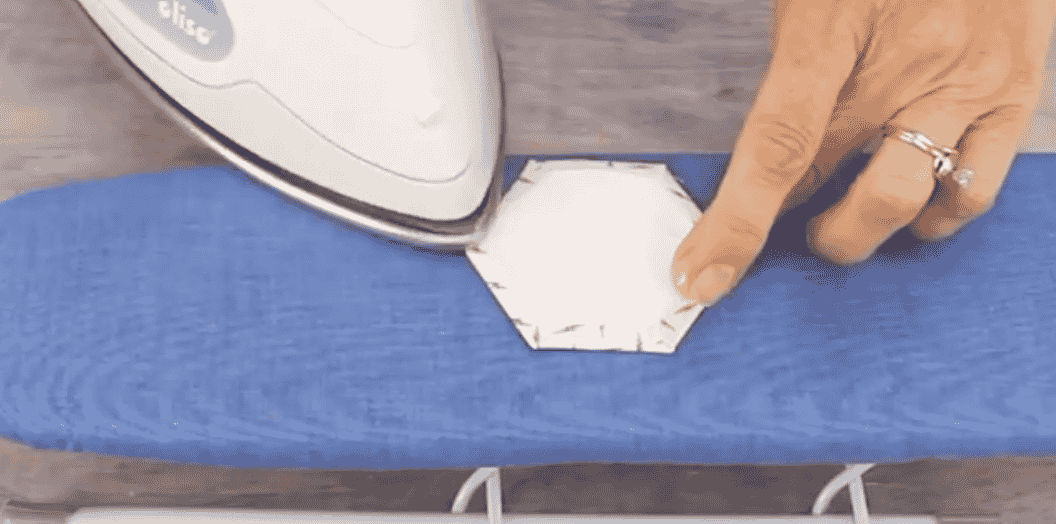
Ahora que hemos terminado nuestra primera pieza, le daremos un rápido planchado para afilar aún más los bordes.
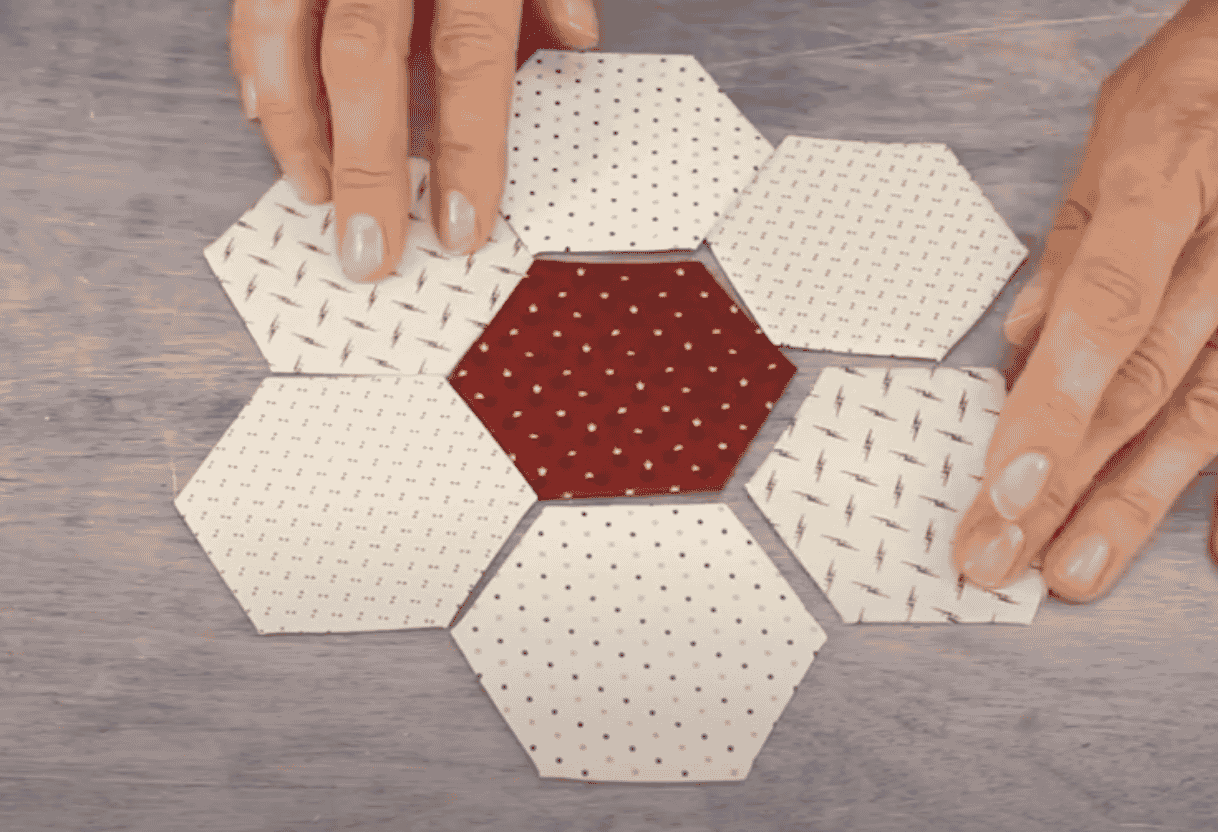
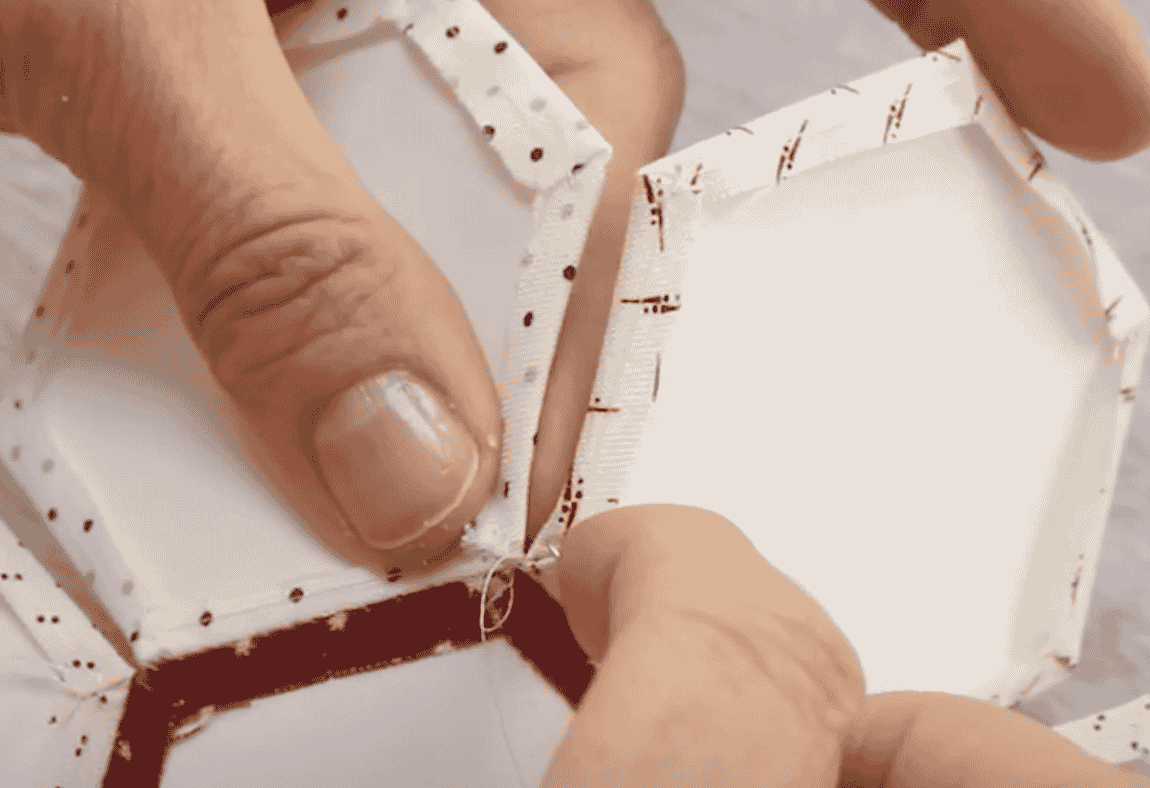
Ahora vamos a unir las piezas. Primero, extiende tu diseño y decide dónde quieres colocar cada pieza. Coloca tus piezas adyacentes con los lados derechos juntos, trabajando desde el centro hacia afuera. Enhebra y anuda la aguja como te mostramos antes.
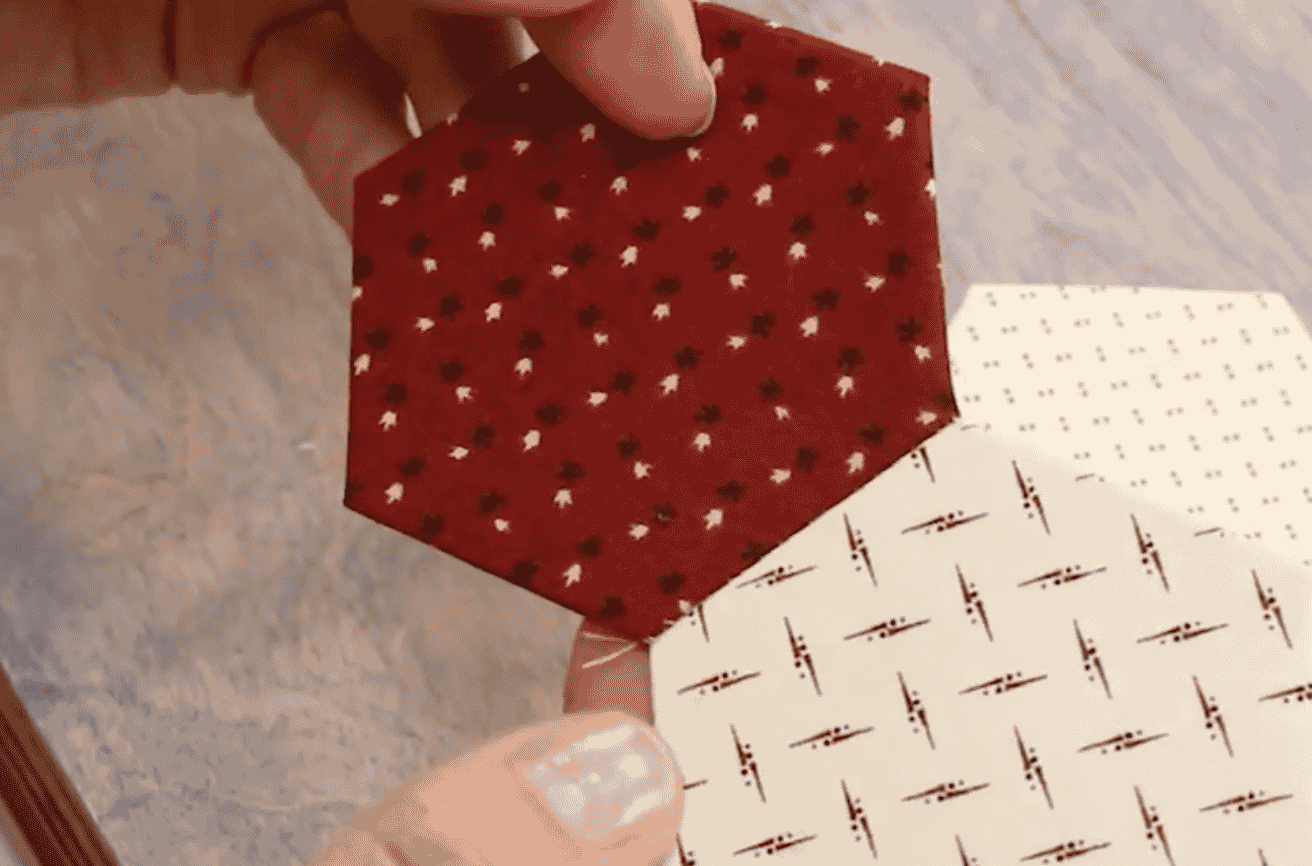
Comenzando exactamente en la esquina, haz unas pequeñas puntadas de látigo asegurándote de atrapar solo una pequeña cantidad de tela de ambos lados. Ahora puedes comenzar a trabajar, haciendo una pequeña puntada de látigo y nuevamente tratando de atrapar solo una pequeña cantidad de ambas telas con cada puntada.
Cuando llegues a la siguiente esquina, vuelve a dar unas pequeñas puntadas en la esquina exacta de ambos lados. Esto asegurará la costura para que no se suelte. ¡Tus dos primeras piezas están unidas!
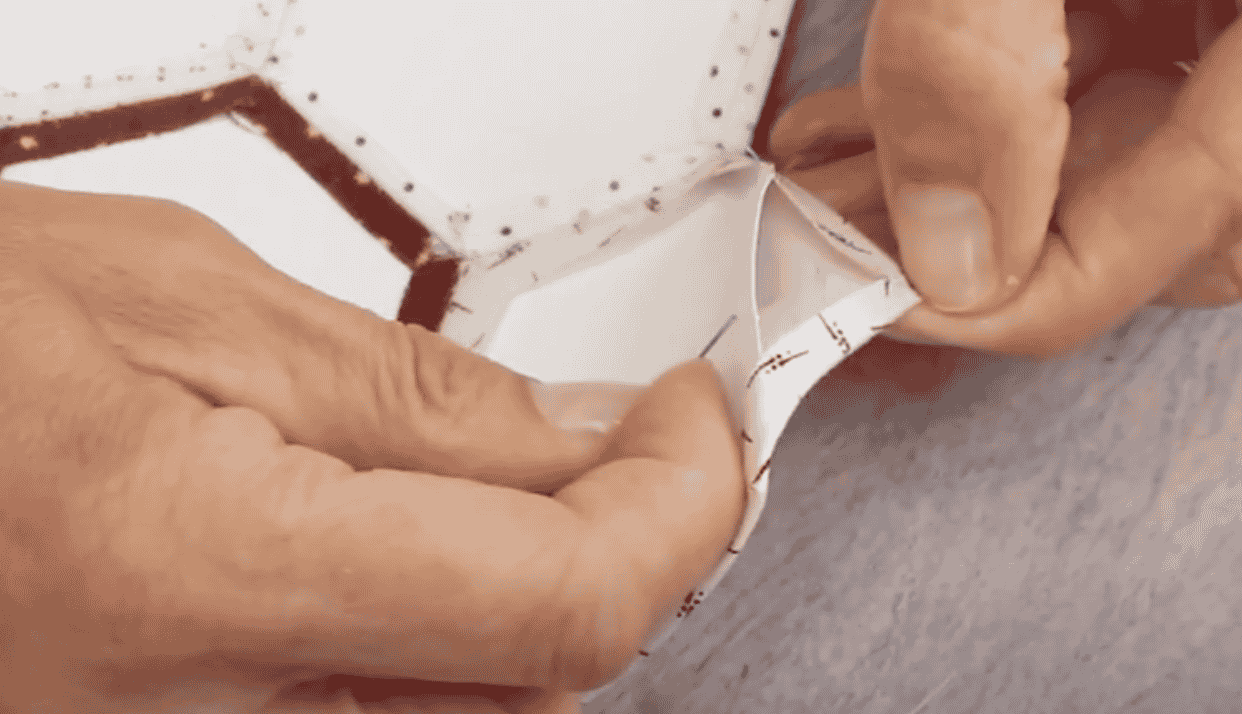
Ahora puedes unir tu siguiente pieza a la pieza central de la misma manera. Recuerda de nuevo coser en la esquina exacta y atrapar ambos extremos de la tela. Continúa hasta que todas las piezas estén unidas a la pieza central.
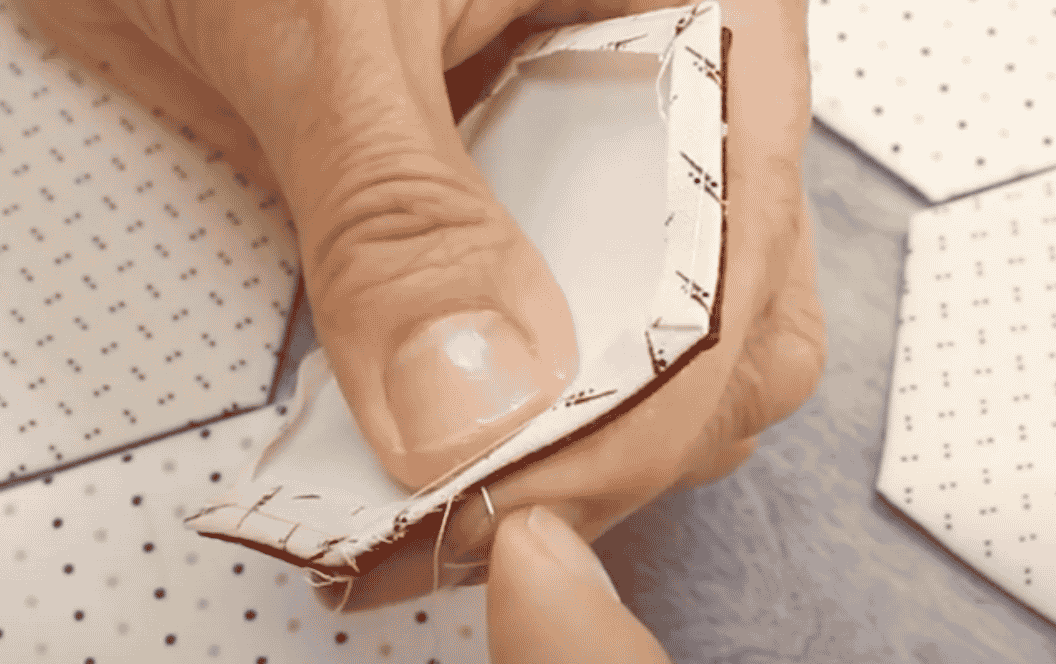
Para unir dos de las piezas exteriores, notarás que no podremos colocar esta pieza con los lados derechos juntos como antes, por lo que tendremos que trabajar desde la parte inferior y unirlas de nuevo con un punto de látigo. Doblarlas ligeramente una hacia la otra lo hará más fácil.
Una vez que tu diseño esté completo, querrás quitar las plantillas de papel. Insertar un alfiler en ellas te ayudará a sacarlas. Si usaste pegamento, un ligero rocío de agua puede ayudarte a liberar la plantilla.
No todos los diseños tienen una flor circular, pero una vez que domines esto, podrás jugar con tu diseño y unir cualquier forma en cualquier arreglo con el método del paper piecing. Deja un comentario si tienes alguna pregunta o algo que compartir sobre tu experiencia con el EPP.
Puedes suscribirte para recibir consejos de costura semanales, patrones gratuitos y tutoriales en nuestro boletín. ¡Regístrate haciendo clic aquí! Puedes darte de baja en cualquier momento haciendo clic en el botón de "Cancelar suscripción" en el pie de página de cada correo electrónico que recibas.