
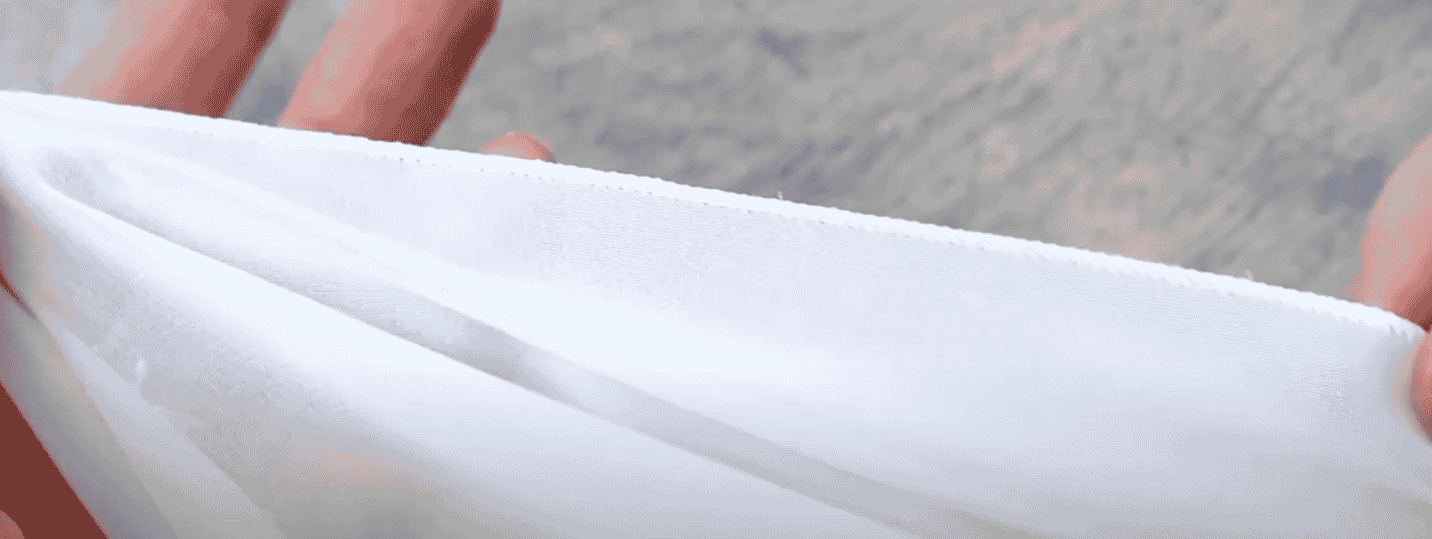
En este video, le mostraremos la forma más fácil de hacer un dobladillo enrollado en tela de gasa, o cualquier otro material liviano similar. Primero lo demostraremos en la remalladora, luego con una máquina doméstica para aquellos que no tienen una remalladora. ¡Usando los materiales recomendados y esta técnica, el resultado será un hermoso dobladillo enrollado que se verá tan profesional como si viniera de la tienda!
Gran parte de la ropa formal utiliza telas transparentes y ligeras, y este método es una buena forma de mantener el borde con un aspecto profesional, como si nunca se hubiera modificado. Aparte de su máquina, solo necesitará algunos materiales pequeños pero importantes:
Primero, querrá elegir el hilo adecuado. Usaremos un hilo de poliéster de 100wt llamado InvisaFil, que se mezclará muy bien con la tela para que ni siquiera lo vea. Y como el hilo es tan fino, coserá más fácilmente a través de la tela delgada, lo que resultará en menos volantes. Es importante usar un hilo muy fino como este porque, aparte de que se nota menos, tampoco pesará la tela ligera.

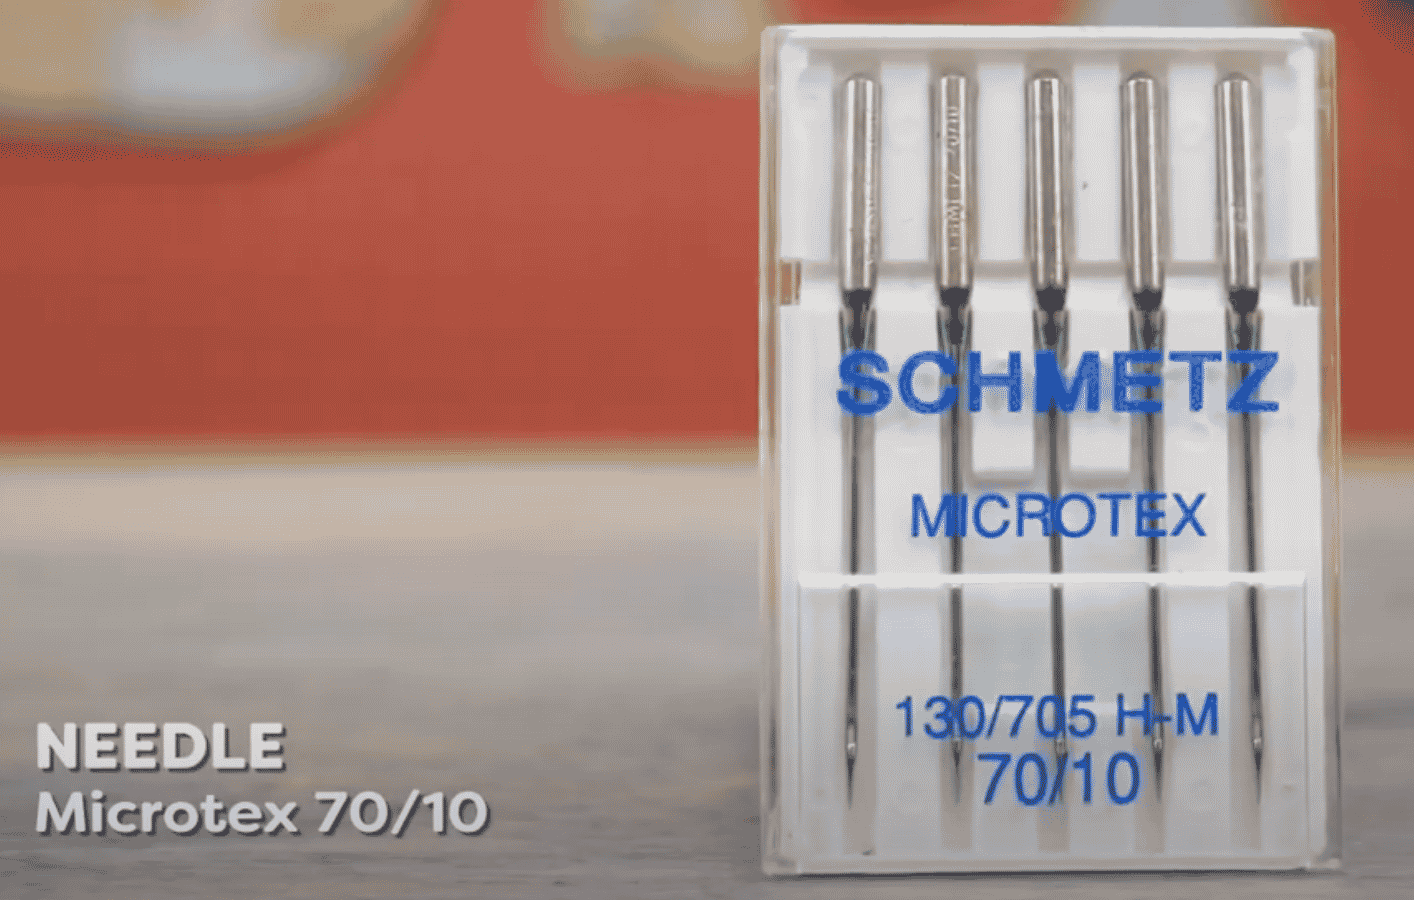
Debido a que el hilo es tan fino, también elegiremos una aguja con un ojo más pequeño. Elija una aguja microtex de tamaño 60/8 o 70/10 que funciona mejor en telas ligeras.
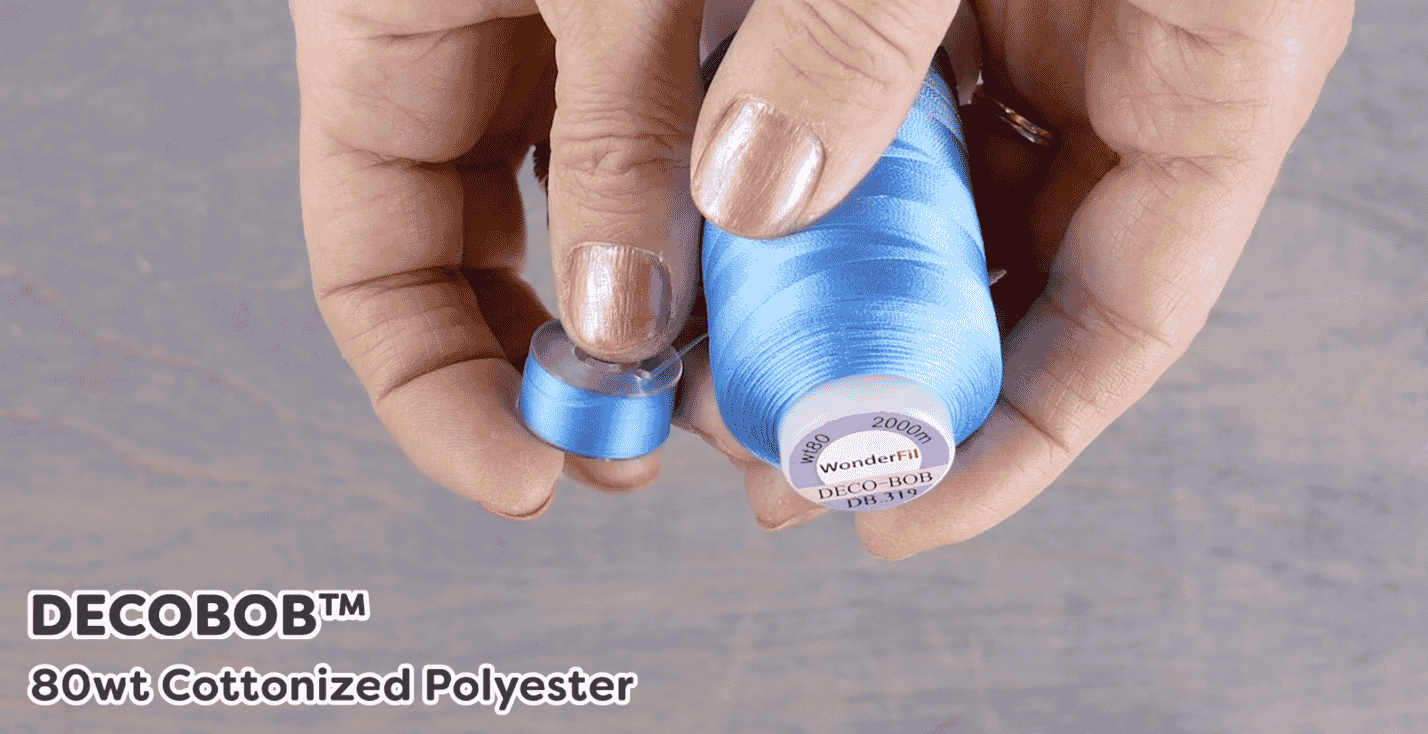
Finalmente, voy a usar una bobina que ha sido pre-bobinada con hilo DecoBob. Este es un hilo de poliéster de 80wt que viene ya pre-bobinado en una bobina con lados de plástico que combinará bien con el hilo superior. Alternativamente, puede bobinar su propia bobina con el hilo InvisaFil, solo recuerde bobinarlo lentamente ya que el hilo fino tiende a flotar. Si va a dobladillar su tela en una remalladora, obviamente no usará una bobina, por lo que querrá hilo DecoBob en un carrete para sus garfios inferiores.
En una remalladora:
Vamos a usar un dobladillo enrollado de 3 hilos, con InvisaFil en la aguja y el áncora superior, y DecoBob en el áncora inferior. Consulte el manual de su remalladora y ajuste la longitud de la puntada y la cuchilla de corte para obtener un dobladillo estrecho y ceñido.
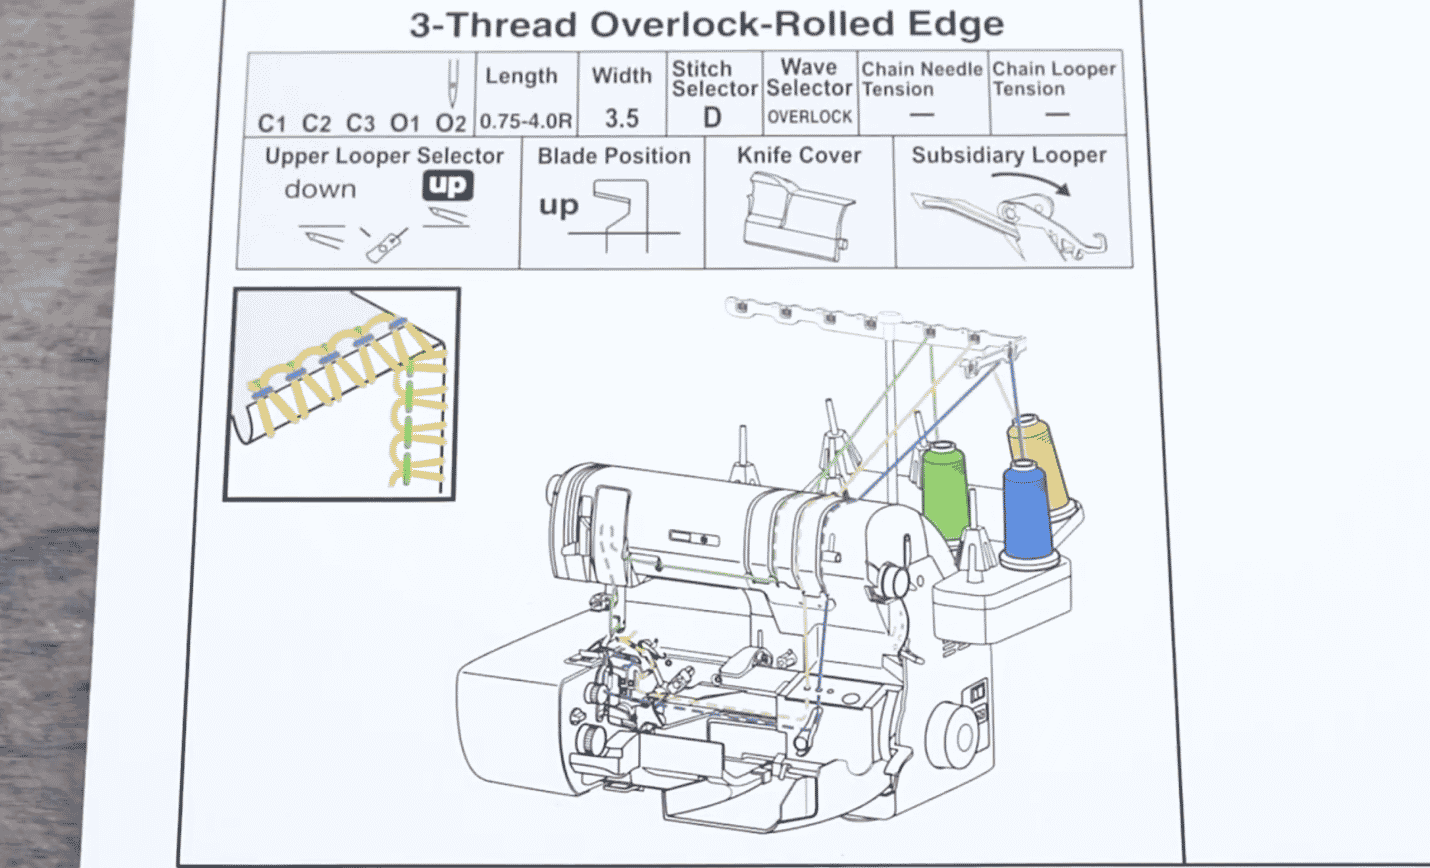
Una vez que su máquina esté enhebrada, haga una prueba en una tela similar para asegurarse de que su tela no se frunza. Es posible que tenga que ajustar la configuración diferencial para obtener un borde plano y suave.
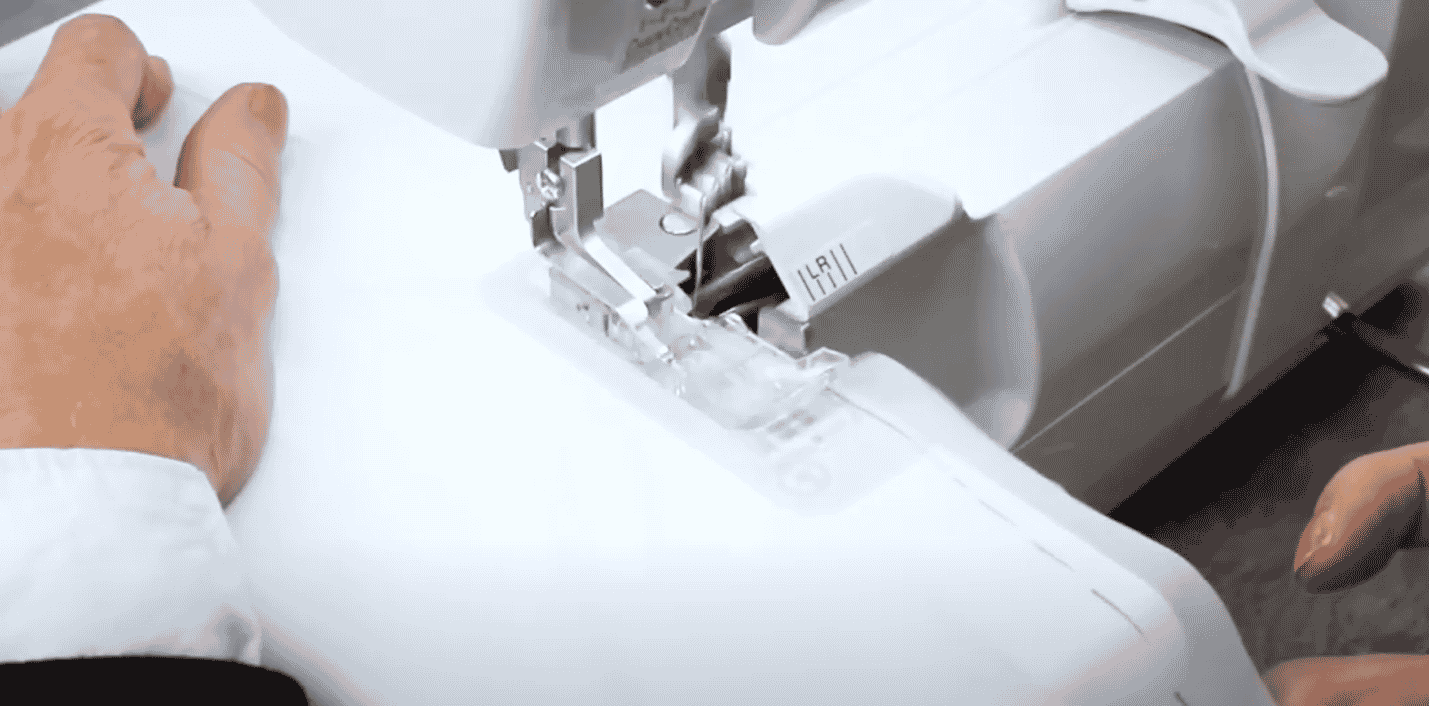
Marque el dobladillo con un rotulador de marcado que desaparezca y remalle exactamente a lo largo de la línea marcada. Este es el método más simple para un dobladillo fino rápido en gasa o telas finas similares.
En una máquina de coser doméstica con dobladillo enrollado:
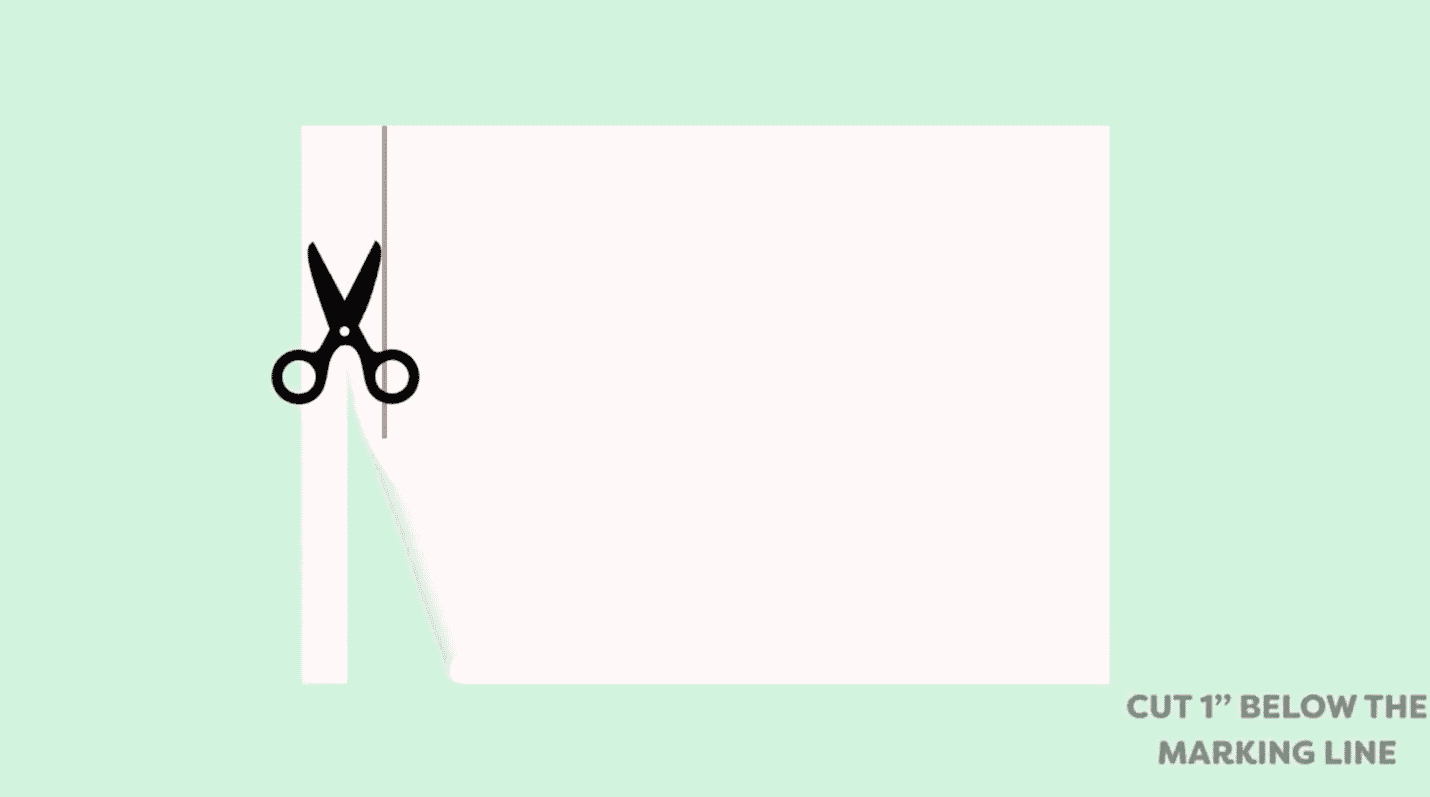
Si desea dobladillar tela fina en una máquina doméstica, este método de dos pasos le ayudará a lograr resultados perfectos. Marque dónde quiere el dobladillo terminado y corte 1 pulgada por debajo de la línea marcada. Recortaremos esto más tarde. Asegúrese de extender la tela plana y uniforme, ya que este tipo de telas pueden moverse fácilmente durante el corte. Enhebre su máquina con InvisaFil en la parte superior y DecoBob en la canilla. ¡Ahora está listo para coser!
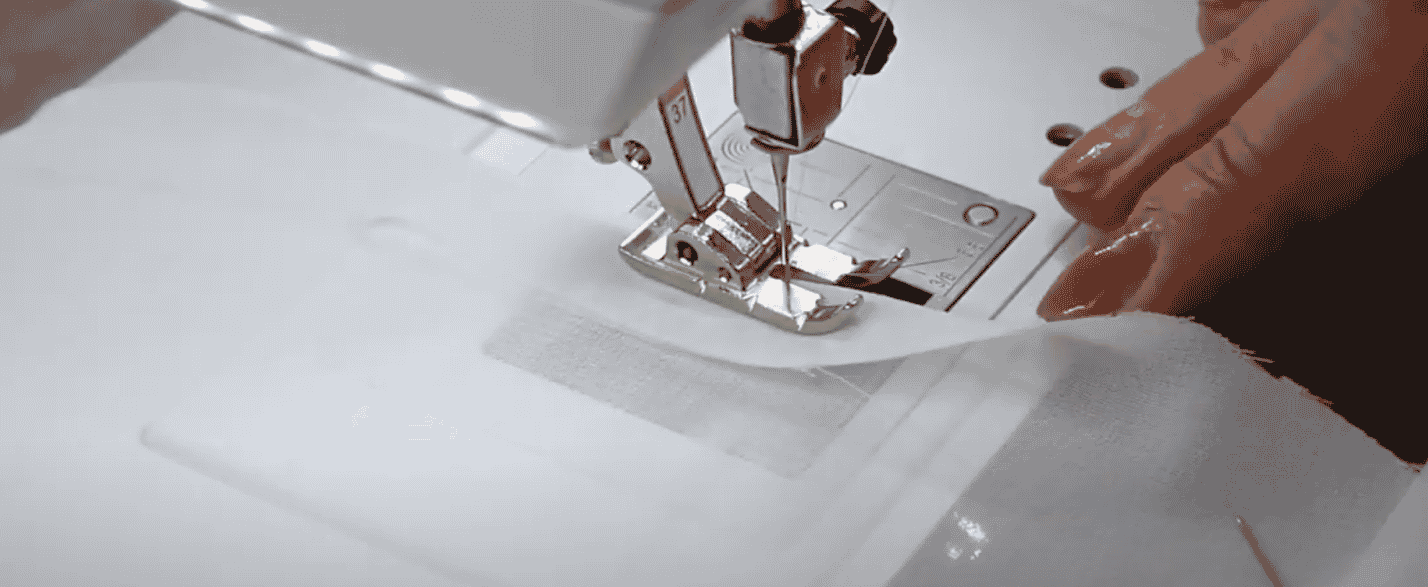
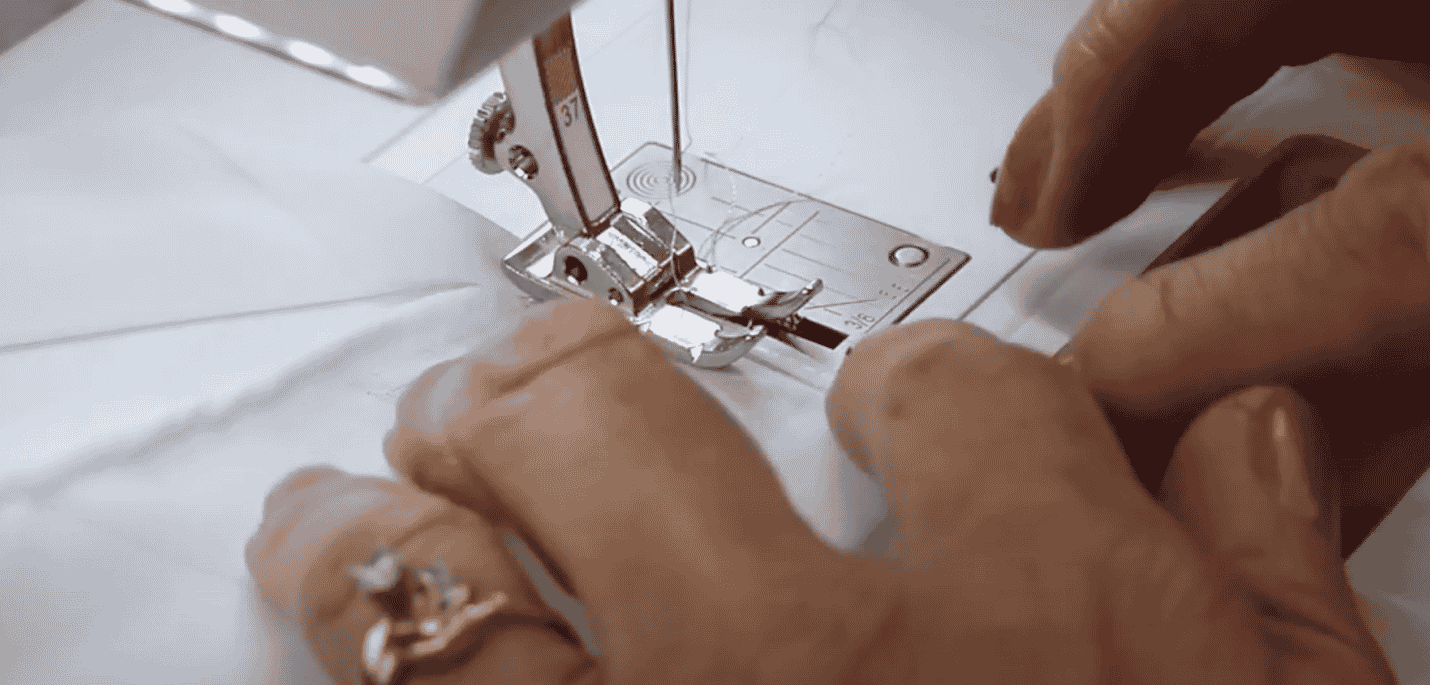
Con los dedos, doble el borde de la tela 1/8" por debajo de la longitud del dobladillo terminado y cosa muy cerca de este borde doblado. Hágalo así hasta el final de la tela. Si está dobladillando una manga o una falda, o cualquier cosa en la que su pieza sea un lazo, le recomendamos que comience y termine en la costura para ayudar a ocultar el remate.
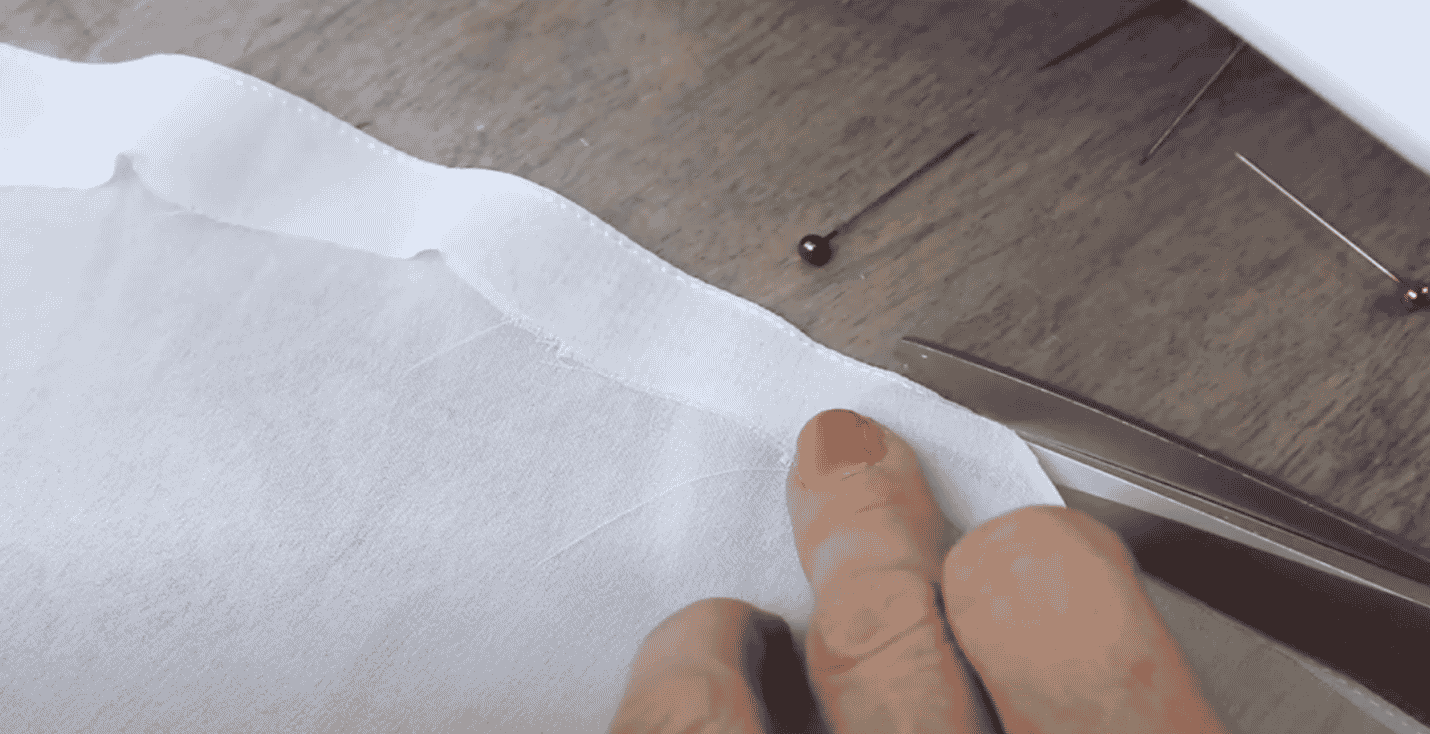
Cuando termine, use unas tijeras afiladas y de punta fina para cortar el resto de la tela lo más cerca posible de la línea de costura sin cortar la propia costura. Tenga cuidado para no cortar accidentalmente sobre la costura. Haga esto hasta el final.
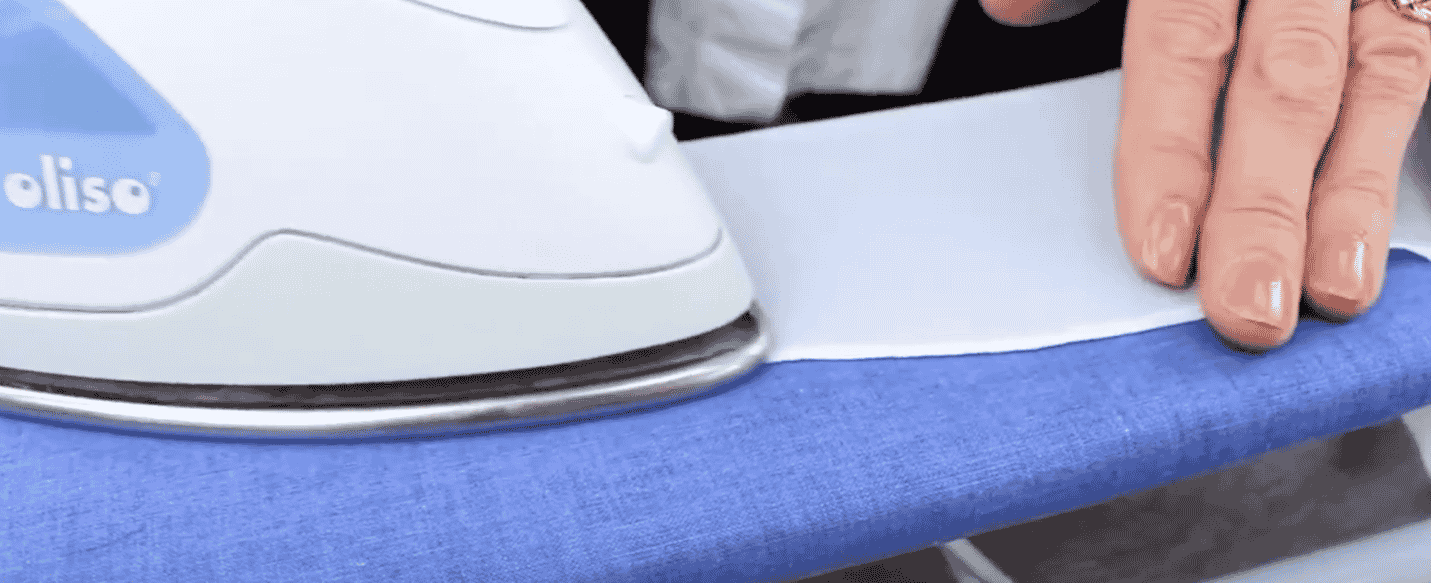
Planque todo el contorno para que las puntadas se hundan en la tela y alise cualquier frunce.
Una vez que haya terminado de recortar el exceso de tela y de planchar, doble el borde 1/8" una vez más (a lo largo de la marca del dobladillo terminado) y cósalo de nuevo sobre la línea de costura original para completar su dobladillo enrollado. Si tiene problemas para doblar el borde con los dedos y mantener la longitud de 1/8" constante, puede planchar el borde antes de coser.
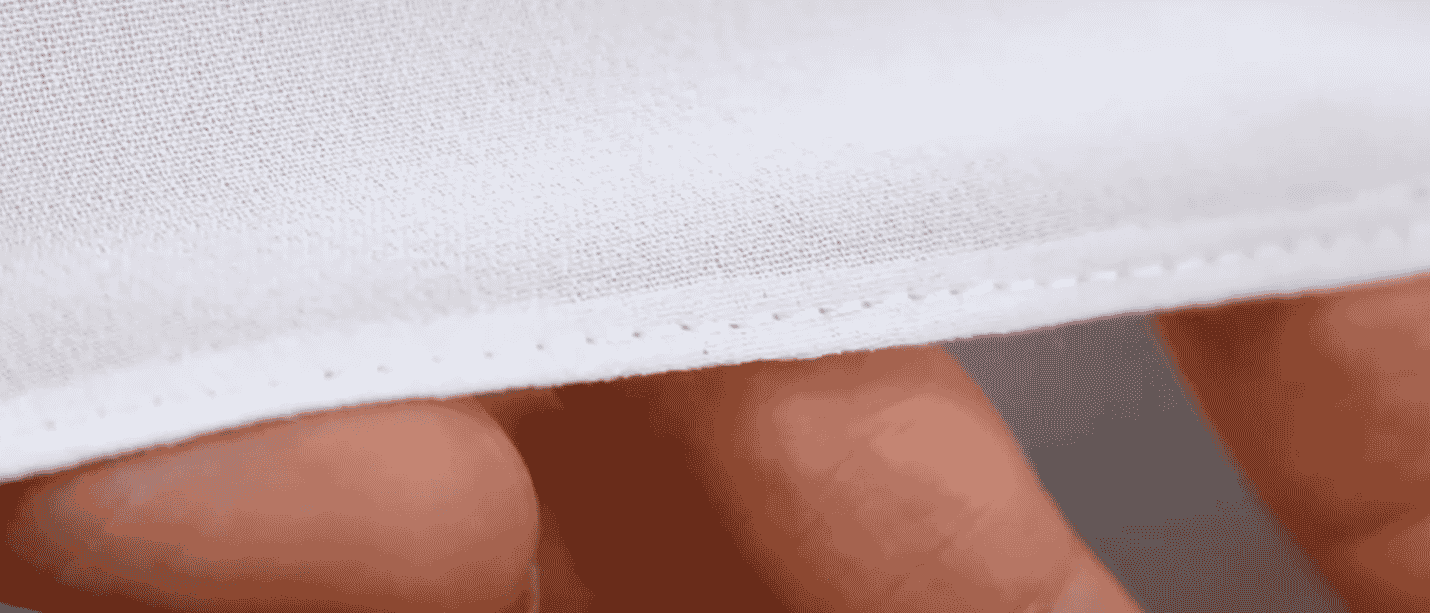
¡Eso es todo! Puede ver lo poco que se nota el hilo en el dobladillo terminado, así como lo plano que queda el borde porque el hilo fino no añade volumen adicional. Como la mayoría de los dobladillos tienen un borde curvo, hacer el dobladillo en dos pasos ayuda a mantener el dobladillo uniforme y consistente y elimina cualquier problema. Estos materiales combinados con estas técnicas simples son todo lo que necesita para un dobladillo perfecto y profesional.
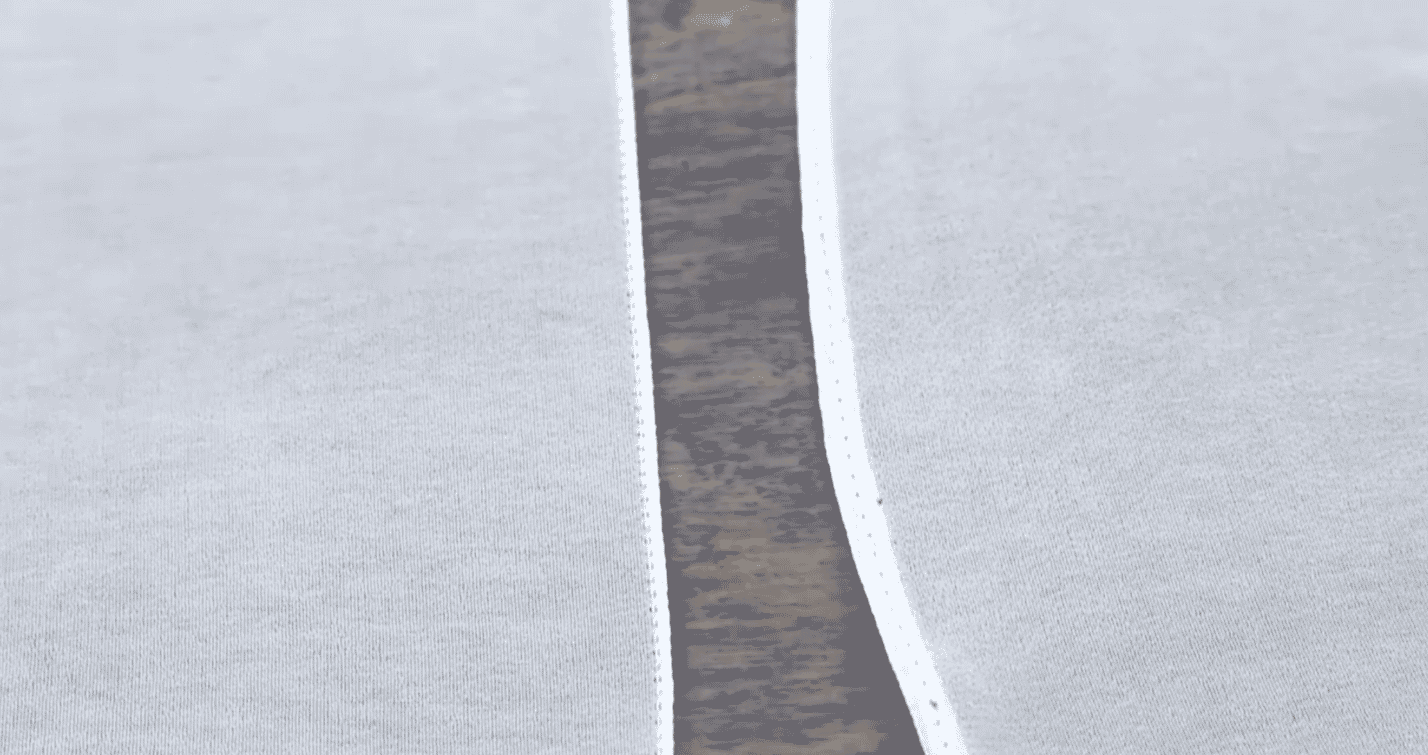 (Izquierda: hecho con remalladora. Derecha: hecho con máquina doméstica.)